 Clutch linkage replaced
Work continued at a slow pace this week, not much left to do. Had to wait a few days for the arrival of new parts for the clutch linkage. Those arrived over last weekend, and I went to work replacing the worn items… but it took a LOT of work.
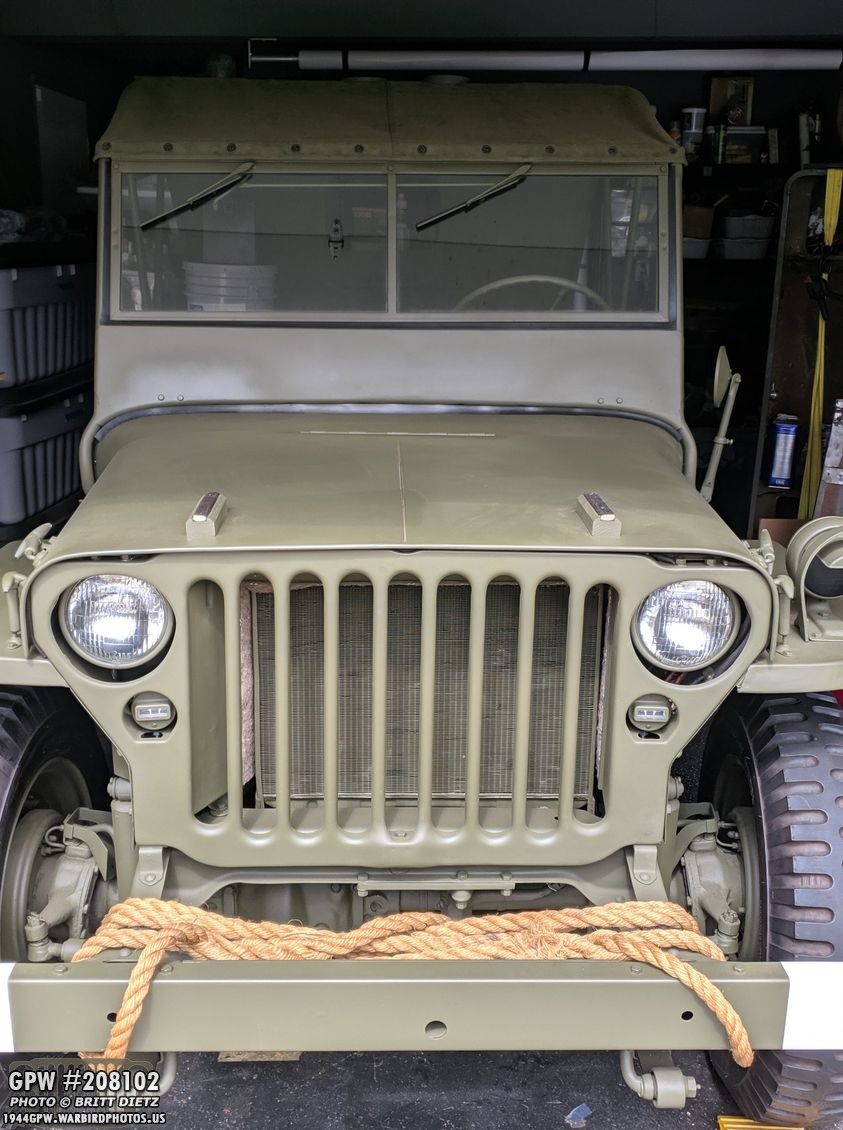
A quick look at the Jeep, awaiting her first drive hopefully sometime soon! I noticed in this shot that I need to hit the windshield (on the passenger side) with some paint. When I fixed a small issue, I used paint that was slightly more glossy than the rest.

If you recall from the last update, after I attempted to drive the Jeep and had some issues shifting (which were partially caused from a too high RPM on the engine), it was suggested that I take a look at the clutch linkage system. Most of the parts are original WW2 F stamped Ford parts, and some of them had wear on them so I’d need to replace them.

Ron Fitzpatrick Jeep Parts had all the parts I needed including a Ford version. Here’s all the parts I got from the kit and the separate clutch tube and clutch control rod to replace the very odd rod that was installed on mine (more on that later)

Here’s a look at the parts in comparison, original items to the left, new repro items to the right. Quality items, they match up perfectly and anything is interchangeable. Note, you ca see just how bad my felt pads have gotten at the bottom. The white ones on the right are new, the black ones are the originals hardened, covered with dried/caked on grease and dirt.

Here’s the new ball stud that goes on the transmission box. I painted only the lock washer and the nut part of the stud, as the rest would be in the clutch tube.
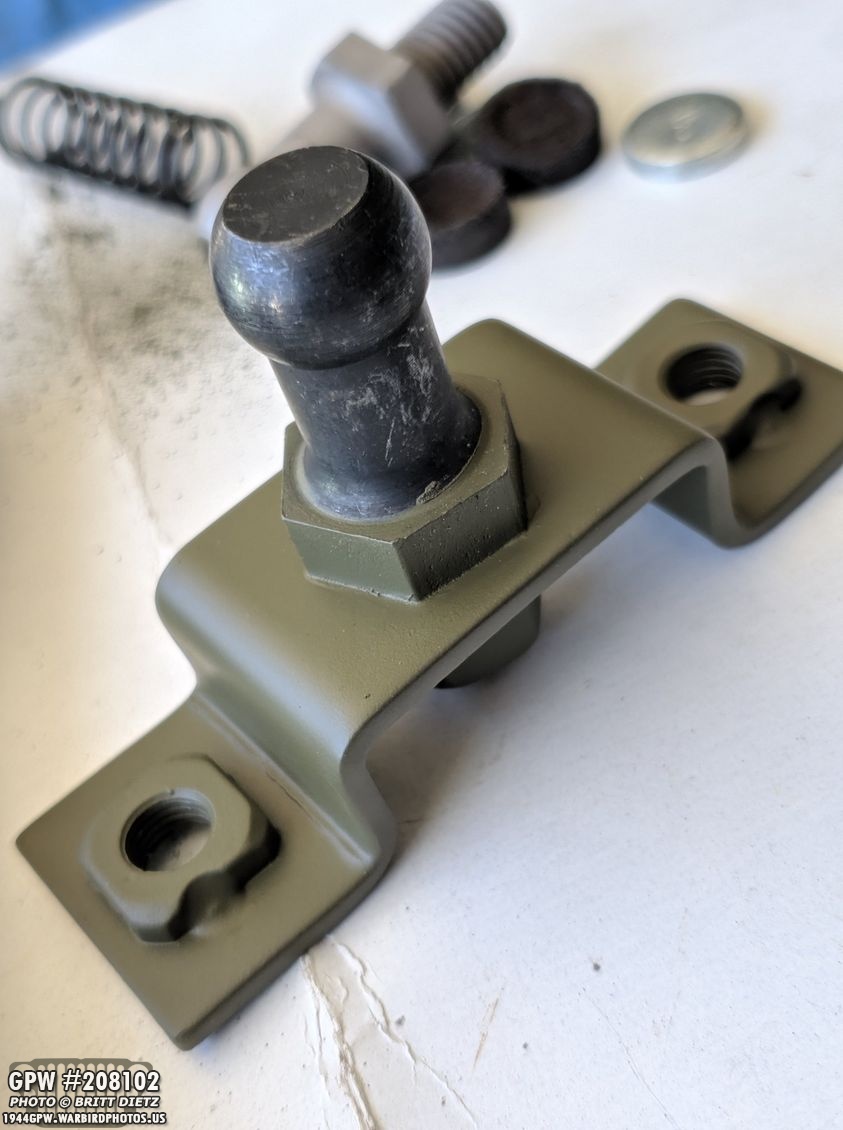
And here’s the ball stud that goes into the bracket on the frame. I was going to keep my original bracket, since it was in good shape, but no amount of force could get that ball stud out of the bracket. After trying to get it loose for far too long, I decided just to use the new one.

Here’s a comparison of the original and the new one (after I’d primed and painted the new ones)

Here’s the clutch tube getting paint after sanding (it came in an incorrect shade of OD Green)
And yes, I did splurge and get the F stamped one since my original has F stamps. I’ll use the original to demonstrate to people, when I take the Jeep to events, what the F stamps look like.

Here’s the new clutch control rod getting primer paint. This was missing from my Jeep.

And here’s a look at both the new clutch control rod (after a final coat of OD Green), and what used to be on my Jeep which was some inventive way of making a rod. One end has a ball stud with nut and a pivot sleeve… the other end has a yoke and a pin with cotter pin. In between is a long threaded rod and allowed adjustment. I opted to go for the correct way and get the one-piece rod.
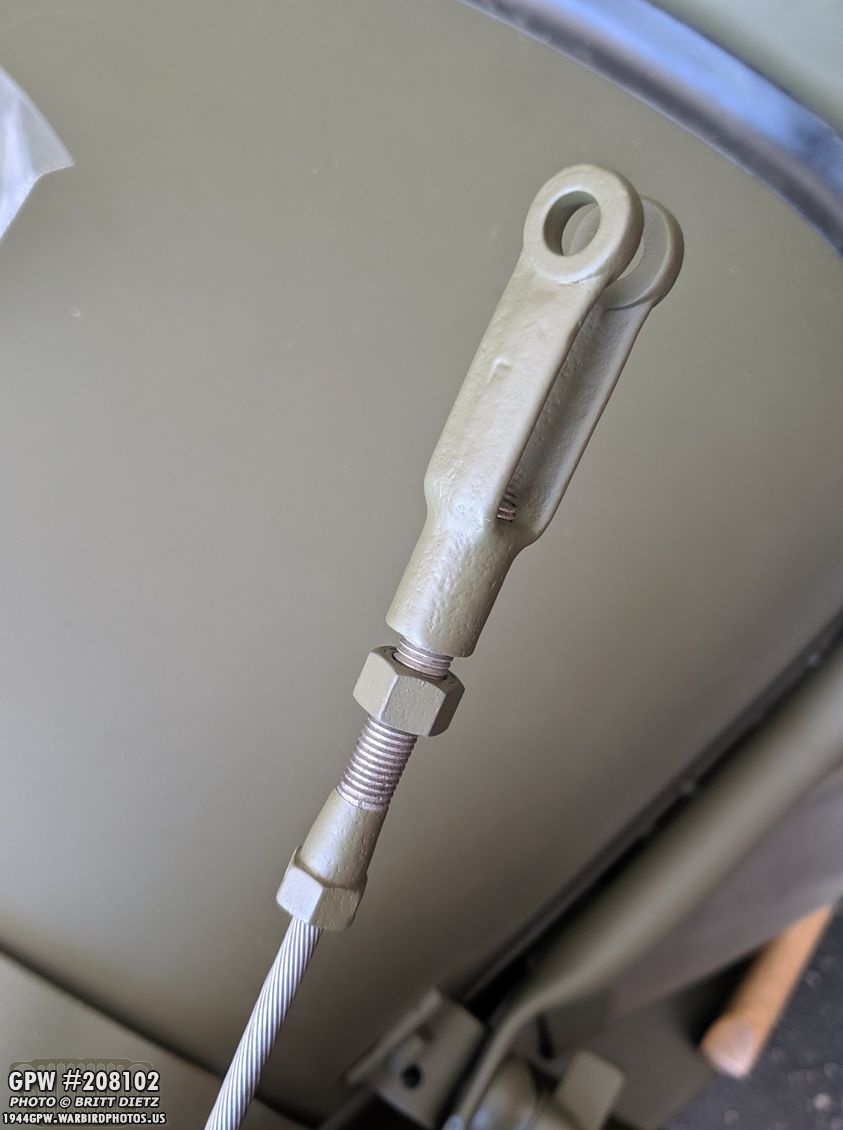
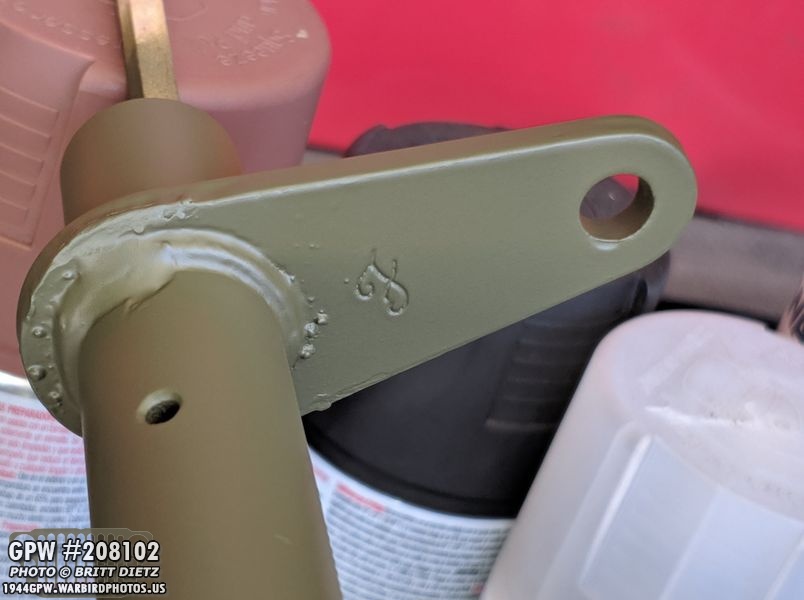
Here’s the clutch control lever cable after priming and painting the yoke and stop nut. You can see the plain F stamp. With all the paint and crud on it before, you couldn’t see the F.

Here’s a look at how it all goes together for the clutch linkage. From the clutch control rod that comes from the clutch pedal (bottom left) to the clutch control lever cable (top right) that goes into the bell housing to a ‘fork’ that disengages the clutch. Connecting those two is the clutch tube, which on the left has a bracket connected to the frame, the ball stud, a rubber dirt seal, the felt pad, and a F stamped disk that holds that all in place against the cotter pin going through the tube. On the right is the ball stud that goes into the transmission box, another rubber dirt seal, felt pad, a spring to help keep the tub in place, another F stamped disk that goes against a cotter pin in the tube on this side.

Here’s the frame side of the tube with the felt pad and F stamped disk behind it.
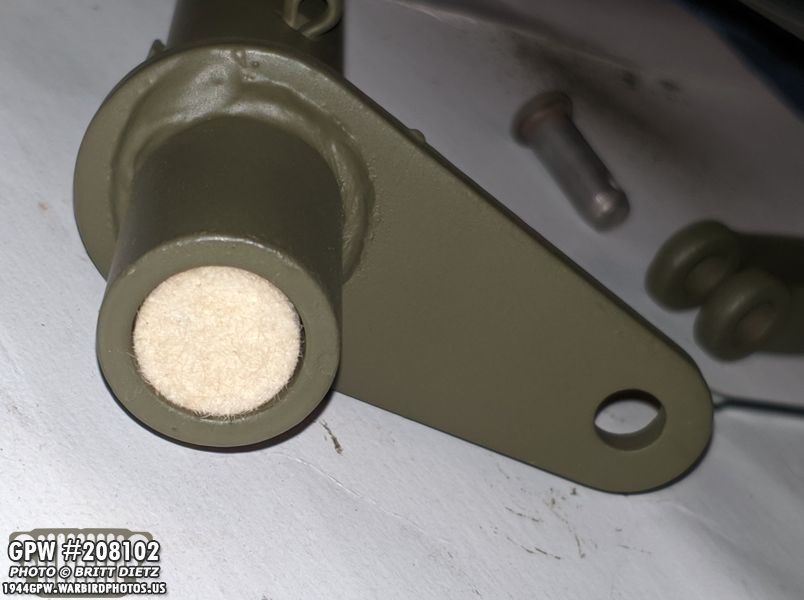
And here’s the side that goes to the transmission box, with the felt pad, spring, and F stamped disk.

Here is the ball stud, and lock washer screwed into the transmission box under the Jeep. The rubber dirt seal is then put on (with some grease).
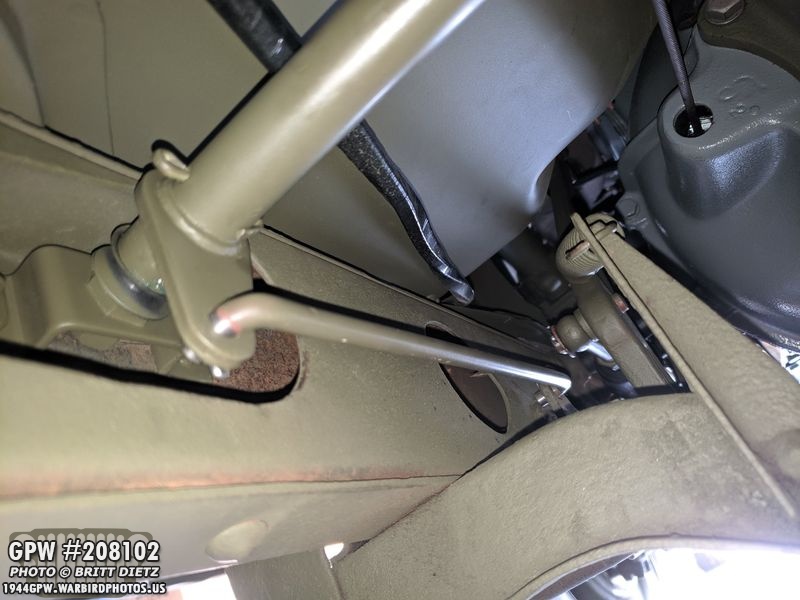
It took quite a bit of work to get the tub installed on both ball studs and a lot of finagling. You can see the grease on both ends of the tube where it hits the black rubber dirt seals (which were missing on the Jeep, probably rotted away). In order to get this tube to work, you have to first put the transmission ball stud in the tube first (on the right). Then you have to finagle the tube and the bracket that has the ball stud (without the screws that attach it to the frame) in that open area of the frame until you can get the ball into the tube. It’s a LOT of trial and error.

The biggest issue for me was I discovered there was a screw and clip that holds the brake lines right next to the bracket. That prevented me from getting the bracket and the tube to line up. Once I took out the screw and moved the brake lines down a bit, I was able to move the bracket and the tube to enough of an angle to get the ball stud to go into the tube. I then used a rubber hammer to move the tube and bracket into position over the holes on the frame (the bolts go through the outside to the inside where the bracket has capture nuts welded on). I’ll touch this area up with some more OD Green paint.

When I was taking off that screw and clip that holds the brake line, the nut fell into the frame. As I was putting my fingers in there trying to find it, I touched something and pulled it out… and found a piece of the original rubber dirt seal! It was hard as a rock and obviously looks like it crumbled apart a long time ago. Wonder how long that’s been in the frame?

Here’s a look at the clutch fork I had (not f stamped) to the right that was damaged when it fell off in the bell housing (and it was a HUGE pain to get it out of there). To the right is the brand new one from Ron Fitzpatrick Jeep Parts.

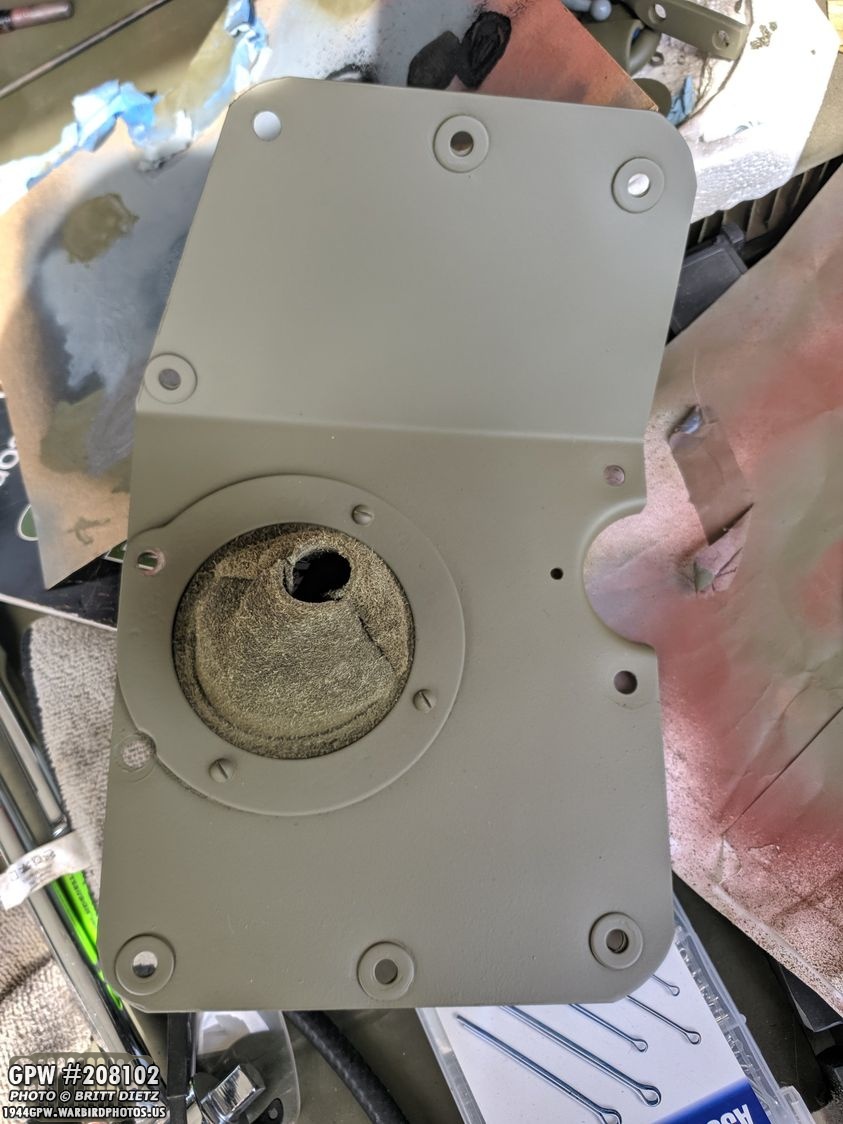
In order to retrieve the original the fell off in the bell housing (this is before I knew it was damaged) and eventually replace it with the new one, you have to remove the covers under the shifter and transfer arms. I was sad to do this as I had made them look nice and neat.
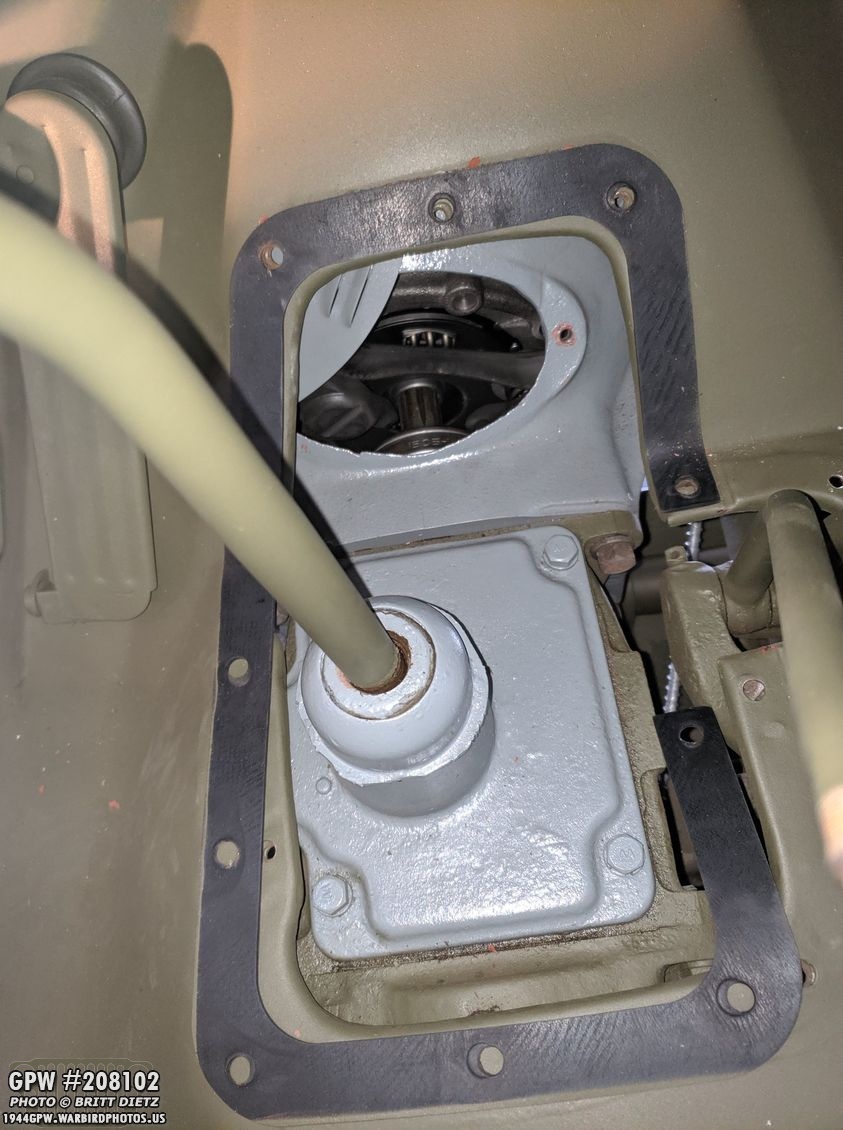
After the covers are off, you can unscrew two small bolts (I only have one off) on the bell housing to rotate out of the way a maintenance cover. You can now see the clutch and get into the bell housing. It’s a small opening, however.

Here’s a more close up inside the bell housing. The fork pivots on a ball stud (blue arrow) and pushes up on a ear (yellow arrow, only partially visible) of the clutch release bearing carrier. So I will need to make sure that the fork is on that ball stud and behind (towards the rear of the jeep) the ears of the carrier.

Here’s a visual explanation… The fork (red) pivots on the ball stud (blue) when being pulled by the control lever cable (green) pushing against the ears of the release bearing carrier (yellow). It’s trick to get it in there when the engine is all put together and the body tub is on. When I put back together the bell housing a few months ago, it was easy with all that not installed. Now, much harder.

Crystal and I spent a very long time of trial and error trying to get that darn fork (red) to get on the ball stud but behind the ear (yellow). You can see here the issue, with the fork being in front of the ears, not behind them. And it was easy to move the fork around too much and it would come off the shaft and fall down below into the bell crank. Then that meant I’d have to manually (slowly) crank the engine until Crystal was able to carefully grab the fork.

One thing that helped was making sure I had the control lever cable in place attached to the fork. That helped to prevent the fork from falling off all the time. Eventually, I got it by turning the engine so the clutch was out of the way enough to pivot the fork to an angle, slide it off the shaft, manually move the ear forward, push the fork back in, and make sure it was on the ball stud. It took several HOURS, but it finally was installed.

With that installed, I was able to put the pin through the yoke on the control lever cable and put a cotter pin through to hold it in place. Once I verify everything is working good, I’ll bend the cotter pin so it’s locked.
With that all in, I was then able to install the clutch control pedal rod from the pedal to the ear of the tube. I put the cotter pins in without bending them as well, just to make sure it’s a good fit. So far, so good! I’ll bend the pins, lock everything in place, and touch up the paint this week.

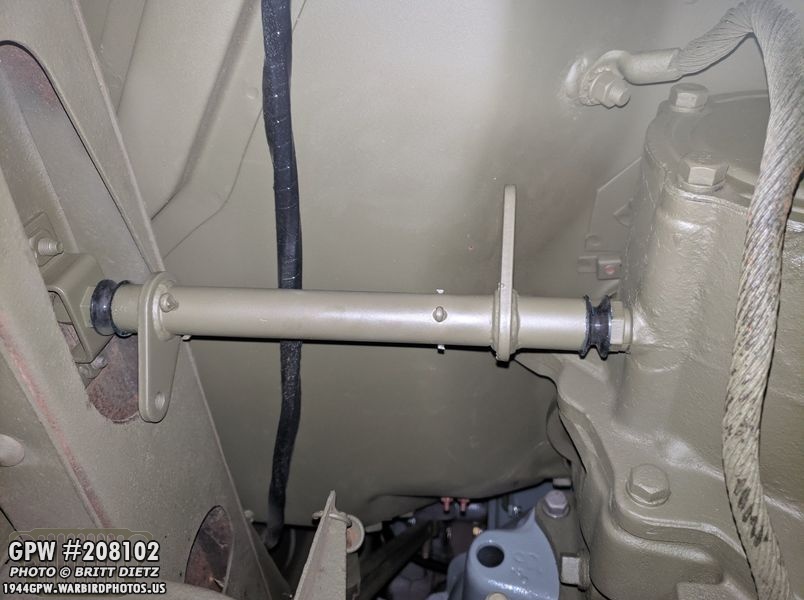
Here’s a look at the whole setup, now that everything is installed.
Having the cover off did mean I could touch up the paint a bit, so I took some time to sand areas where the bolts had ripped up the washers (which are stuck on with friction and paint).

I was using slotted screws with a washer to hold down the leather boots for the shifter arms. This was a pain to install and uninstall as it took two people, one unscrewing while another was under the jeep holding the nut for each screw. I decided to do the same thing has the steering column shaft and use slotted wood screws. This is only for the 6 screw holes that hold down the seals for the leather boots.
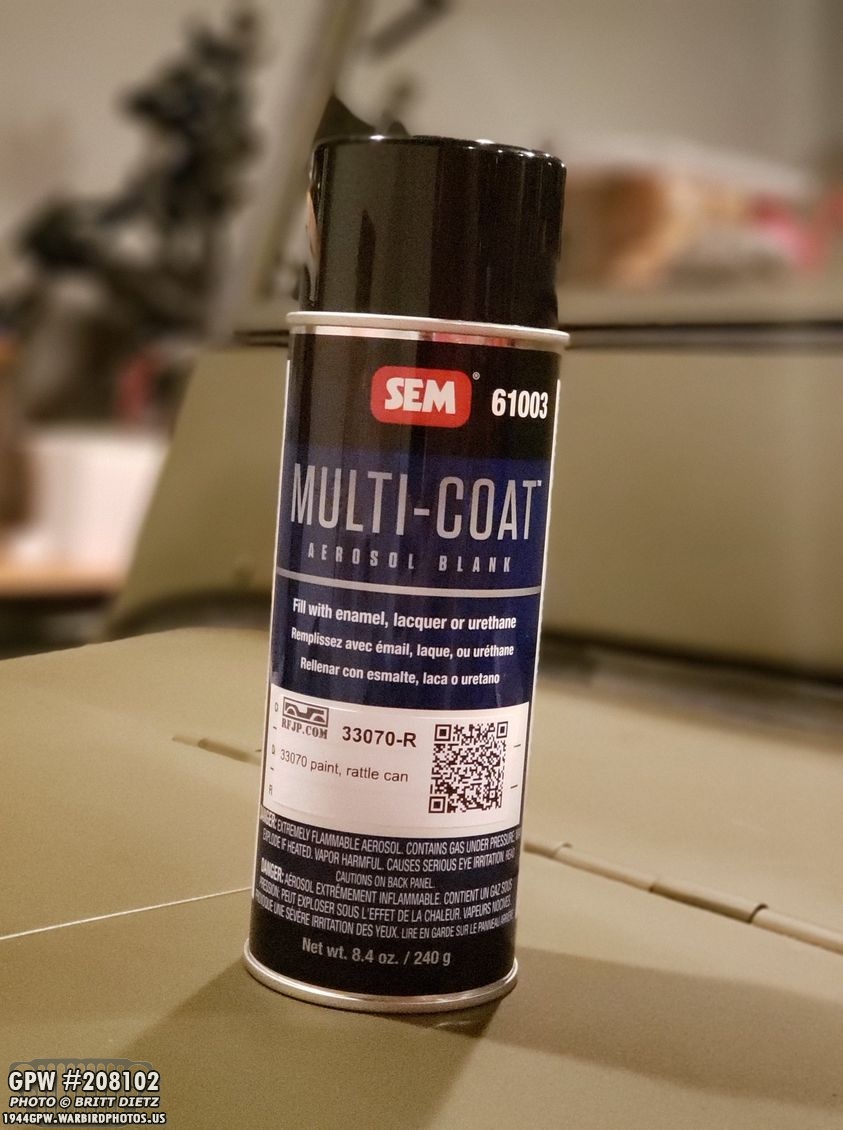
Speaking of paint, want to give a shout out to Ron Fitzpatrick Jeep Parts and their 33070 spray paint. It’s a 97% match with the RAPCO/Gillespie 33070 gallon paint. It’s very difficult to tell the two apart when both are dry, so if you want a cheaper alternative to the more expensive RAPCO spray paints, use RFJP!

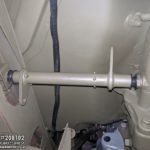
Another item that’s been bugging me still is the hood pivot bracket. It likes to scratch up parts when I open and close the hood. There’s not enough of a gap between the rotating parts. So every few weeks I have to sand it down, prime it, and paint it again.

Here’s after I’ve painted it with the Ron Fitzpatrick Jeep Parts 33070 spray paint (on RAPCO/Gillespie gallon can spray paint, and see, it’s close and it’s even still wet in this shot!). I think I might have to take a small Dremel and made the gaps between the good and the pivot holders.

And the next day, already have more scratches. UGH! gotta make those gaps bigger.

A safety item I mentioned a long time ago was this bluetooth bike signal I got on Amazon. It can quickly attach to my jeery can strap when I drive at night (or even during the day if needed). It then has a little turn switch (very small) that I can attach to the steering wheel. Both items can easily be taken off super fast but add some extra safety when driving, since the Jeep has no turn signals and (let’s be honest), no one knows hand signals anymore.

Here’s a look at how it lights up with a scrolling left arrow when the switch is turned left.

Finally, one last shot showing the hood latch and catches. I decided to splurge again, and I have some F marked bolts coming from Joes Motor Pool in the UK. I’m not going to be one of those who have to have everything F stamped on my Jeep, but I might replace out certain highly visible items on the Jeep with F stamped ones over time. That’s it for this week, airshow season is back in full swing starting this weekend, so next week’s update might be pretty short. But let’s cross our fingers it includes a first drive!