 Canvas Half Door Curtains!
Another fun addition to the Jeep this week, Canvas Half Doors! Also known as canvas curtains, these were issued with Jeeps, but were one of the first things the GIs would toss! I go into how they are installed and removed, and my thoughts of them on after a drive. Also, I tackle another test for the rear axle clackity sound, and begin work on replacing my water pump!

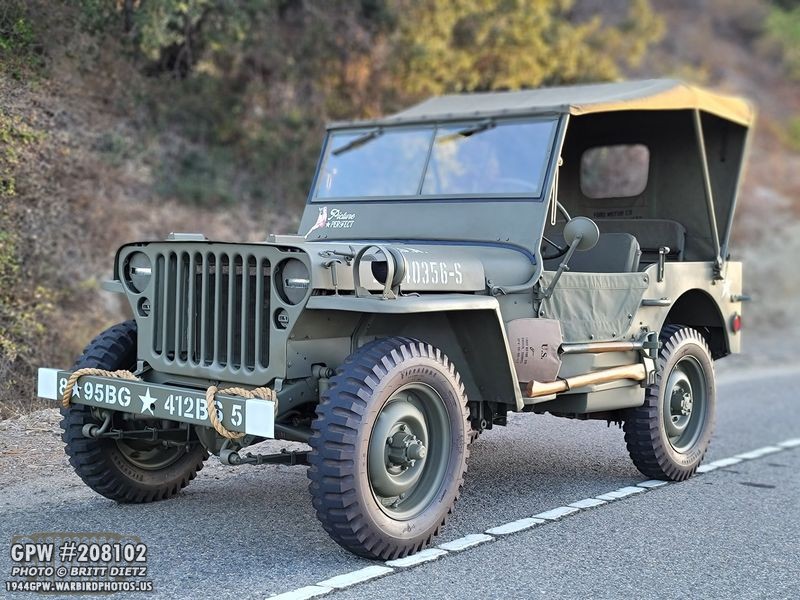
Here she is with canvas half doors! Often not added to many restorations because of their being more of an annoyance than a feature, but I think they really add something.

Here they are, fresh out of the box when they arrived! I mentioned several weeks ago that I had traced the sides of my Jeep and sent the tracings to the United Kingdom where John and Mary Worthing of CanvasCo made these exact replicas to perfectly fit my Jeep. These are not cheap, but for the quality of work and price, you get the best value. They did my Canvas Top and Canvas seat cushions as well.
Here’s the first one after I excitedly went to test fit them real quick later that day. They take a second to figure out, but once you get it, they are pretty easy to get on.

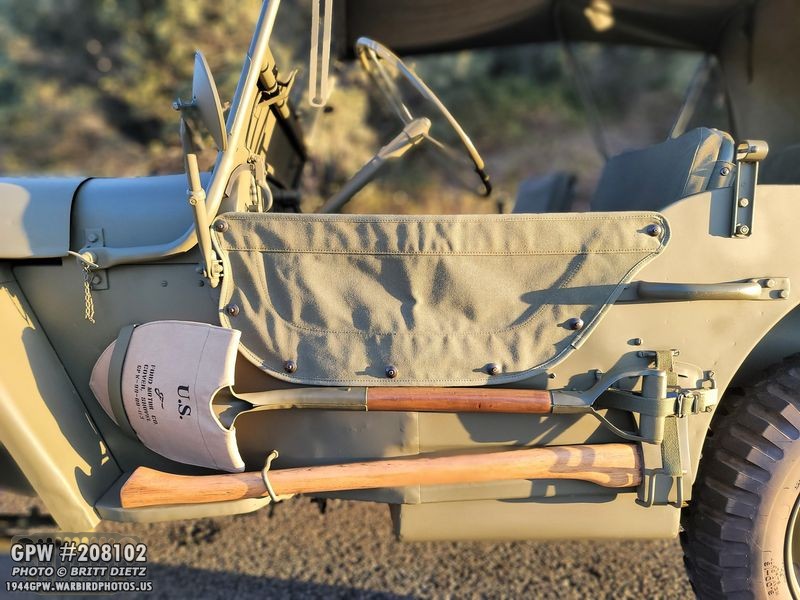
Flash forward to yesterday (Thursday) when I finally had a chance to take the Jeep out for some photos with the half doors on! While the sun is hitting my canvas top making it a yellowish color, the canvas for the half doors perfectly matches the canvas on the seats and top!

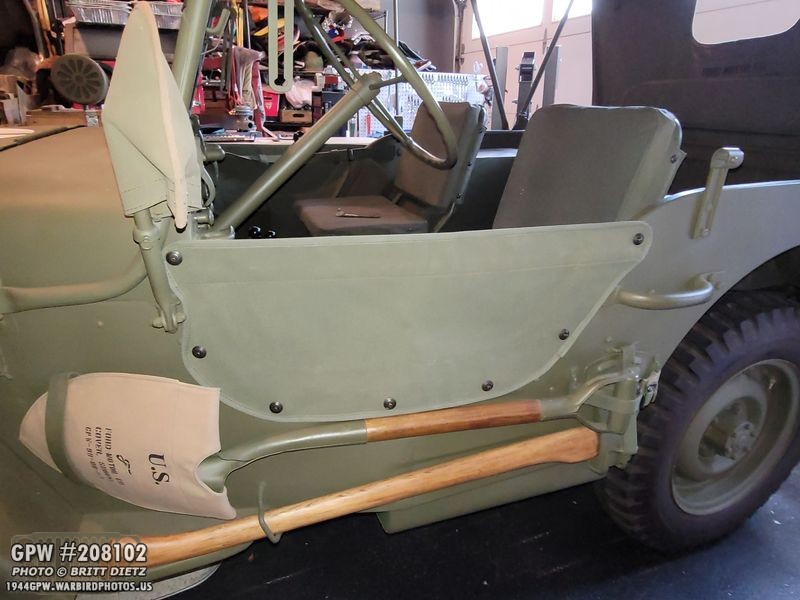
Here’s a look at the passenger side.

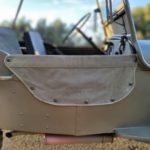
Looking at the inside of the passenger side door, you can see the two ‘flaps’ on the other side that fit over the side of the body tub conforming to the curve. Another benefit of the half doors (with the safety strap) is that it helps prevent people from getting into the Jeep!
And here’s a look at the driver’s side door. It’s not really a ‘door’ in the sense that it opens and closes. It’s more of a canvas wall.
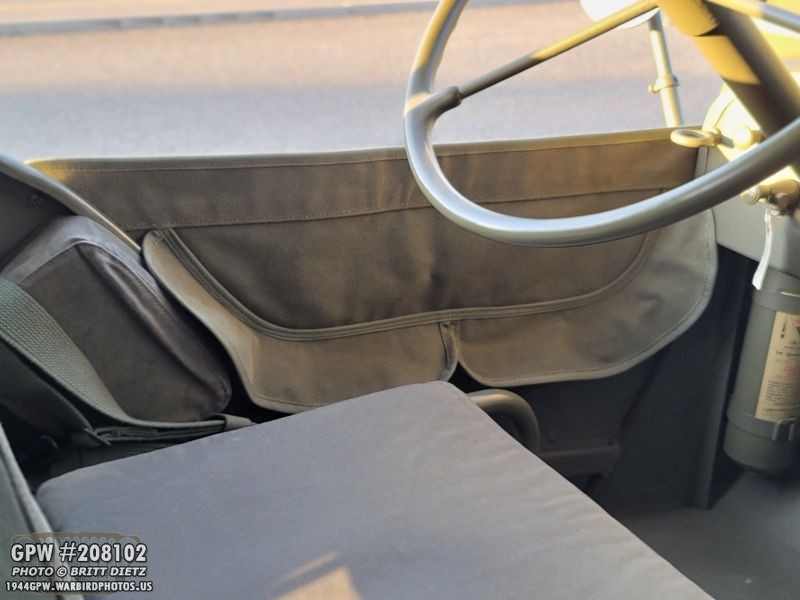
And looking at the other side of the driver’s side door.

So, how are they attached? On MB and GPW Jeeps, There are ‘curtain sockets’ that should be around the ‘doorway’ of each side of the Jeep. There should be seven of these sockets on each side.

Here’s a look at the curtain sockets. They are a bit confusing on how to install. They actually require a special tool.
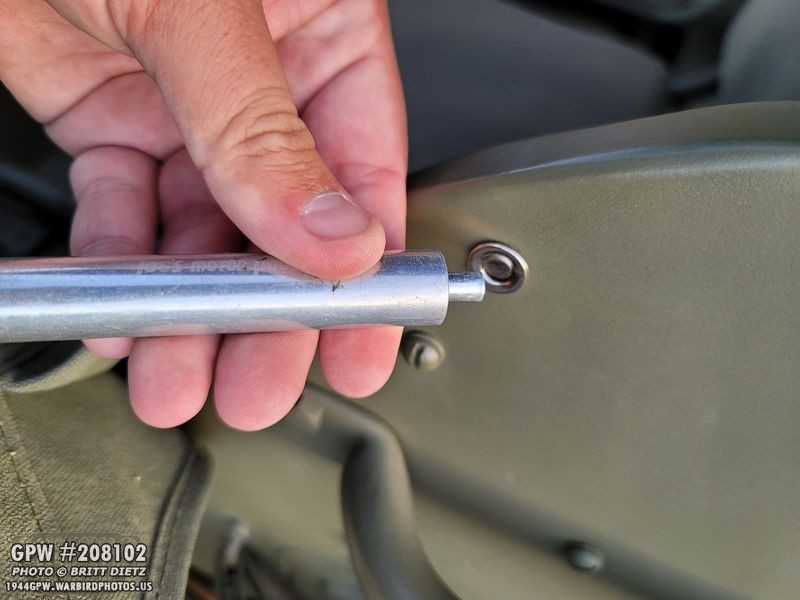
Here’s a look at that special tool, which you push the small peg end into the socket and hit the other side with a hammer. That drives the socket into the holes on the body tub and expands them a little, causing them to stay.

On the canvas half doors, there are special push button snaps that are installed and ‘should’ be in the same positions as the ones on the Jeep. Now, on WW2 factory Jeeps, these should all have the exact same hole and socket placement. If you have a repro tub or a tub that’s been modified, that’s where things can get tricky and half doors might not line up. It’s always a good idea to send the person making repro half doors a template of your Jeep and the socket locations.

To install the half doors, you simply just press the snaps into the sockets. Here’s a look at the other side of the socket on the half door. Notice the two notches in it?
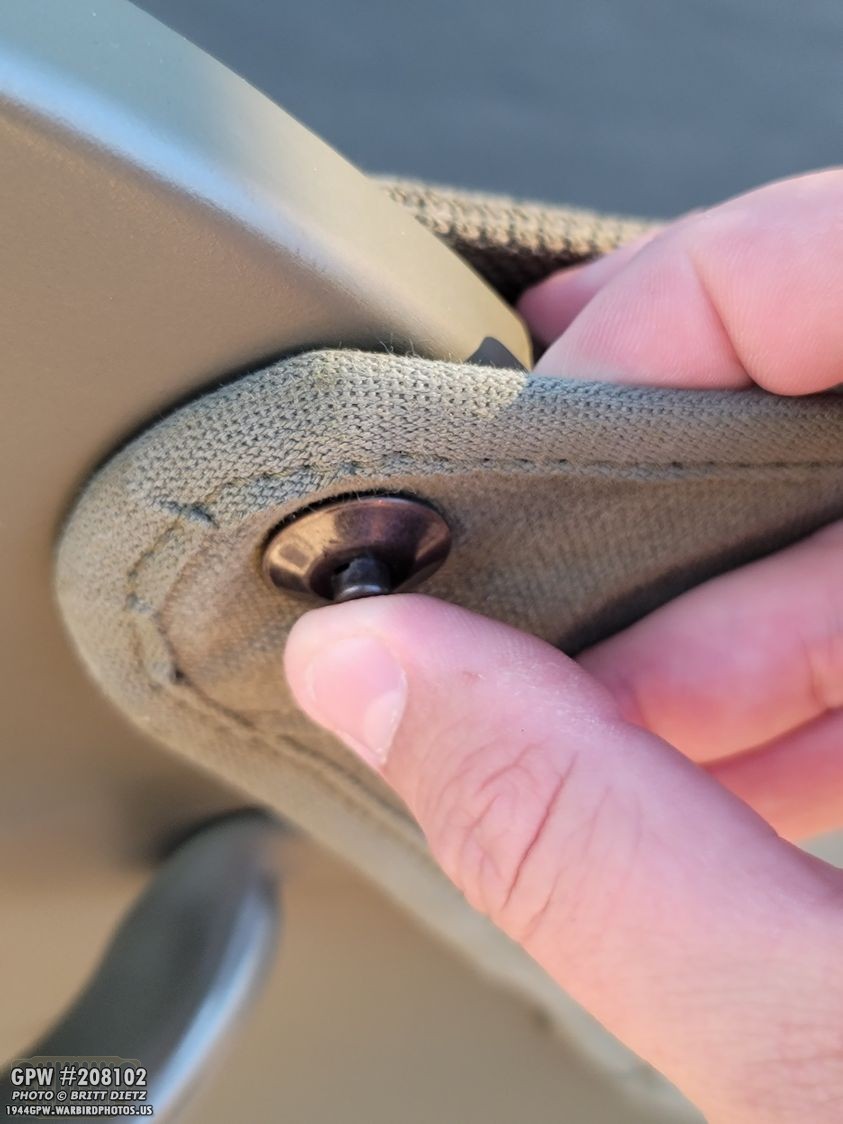
Those latches are what lock the snap into the socket. To get the half doors off, you press the button on the snaps.
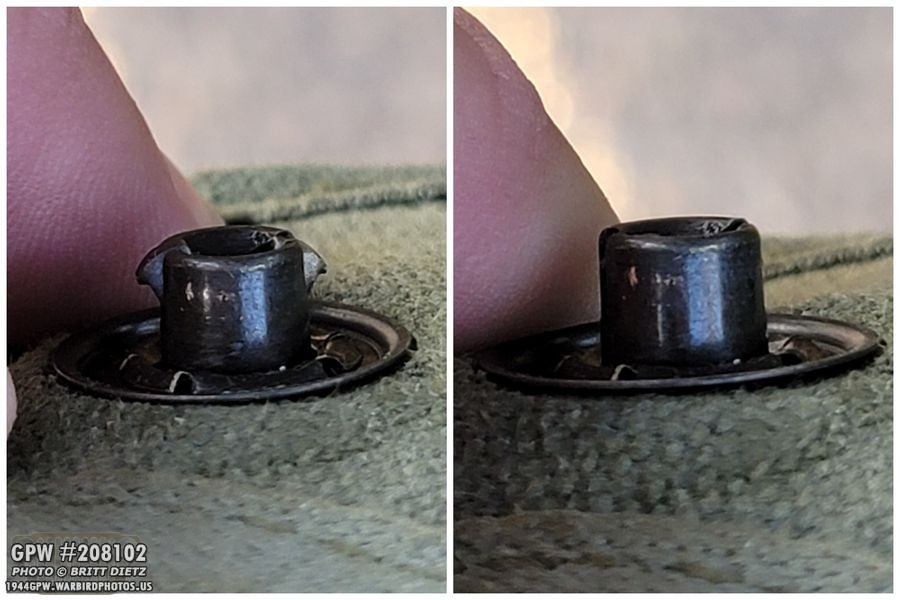
That retracts the little latches into the snap releasing the snap from the socket. On the left is the latches sprung out, and on the right is with the button pressed.

So, that’s how you install and uninstall the half doors. So, what’s the point? Well, I think the idea was that in snow (or perhaps sand/mud) conditions, it can help keep things from coming into the Jeep. Some people say it helps keep the Jeep a little warmer. I’ve read that it stops mud from flinging inside. I could see if helping to keep water away from the driver/passenger when hitting puddles.

But they can be a hassle and are often not added to restorations due to their price and the more hassle than they are worth getting them on and off. I found it pretty easy to get the driver’s side one on and off. But, it does delay you getting out as you have to unsnap at least 4 of the snaps to roll the half door back so you can get out. You CANNOT get out with them fully on. So I can understand why people don’t like them and the GIs threw them out. For me, it only took maybe 20 seconds or less to get the 4 snaps out to get out, so I didn’t mind.

Here’s a before and after… here’s the before without the half door (ignore the radio in the back seat).
And here’s the after with the half doors. I think it really adds a pop to the Jeep! I love details like this. Much like the windshield cover. I opted not to get that, however, as I don’t plan on taking the top down much at all. I really like the top up and the windshield up. So that would just sit folded under the passenger seat and that’s not worth $200+. But I’m happy with the half doors and will be using them for the foreseeable future!
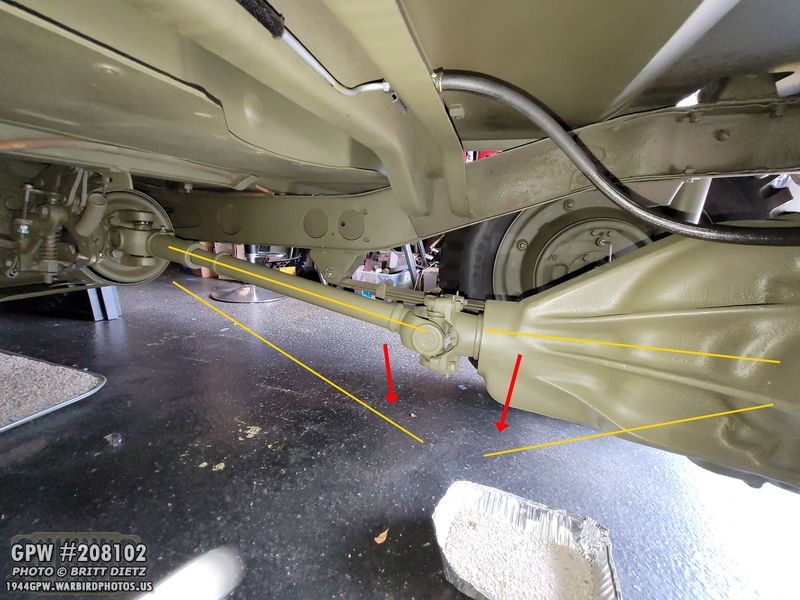
Let’s move on! So, if you’ve followed along for some time, I have had an issue with a mysterious clackity sound coming from my rear axle that’s baffled everyone. I finally got around to doing another test. One theory some people had was that under deceleration, the driveshaft and rear axle on the yoke side drop downward, and with the GoPro videos seemed to suggest that the axle was dipping down too much, causing stress on the pinion and possibly causing it to change positions against the ring causing the sound.
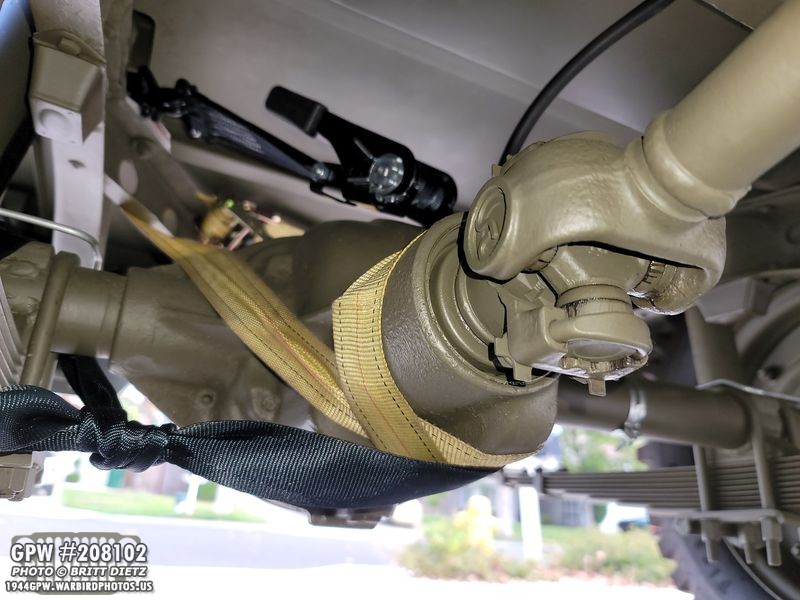
So, I did a test I would NOT RECOMMEND. It was a bit nerve-racking and I’m glad I only did a short drive. I took two ratchet straps (high-rated ones) and ratcheted the axle so it could not drop. There are several things that could go wrong, like the straps slipping into the yoke, which would be terrible. So I kept it slow, and just went up the street and back in 1st gear. GoPro video shows the test worked, the axle barely moved downward keeping a nice parallel with the driveshaft. Sadly, the test showed that this wasn’t the issue, as the clackity sound did not change. Sigh. Back again to the drawing board.

Last year, I tackled an issue where when my radiator would overflow, the overflow relief tube would dump the coolant all over the CJ axles. Over time, that stained the axles to this brownish color from the gunk that was in the radiator and block.
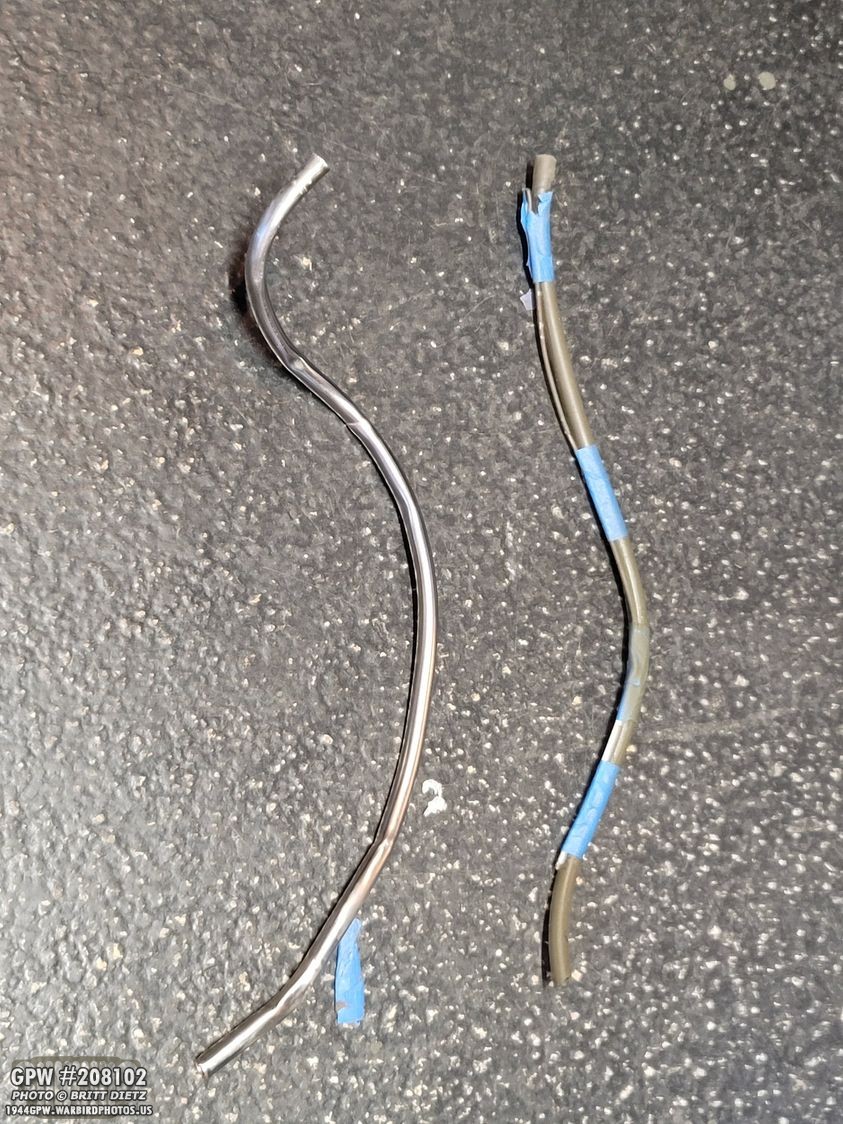
So, I saw online that someone ‘extended’ the relief tube beyond the axles so that it would just drip on the ground instead. I had trouble finding a tube that would work, so I ended up getting a steel tube that I bent to a specific shape (left).

I used a modern-style clamp to attach it to the end of the radiator relief tube, but it never quite fit right. It did its job not getting coolant on the axle anymore, but it would vibrate against the Jeep at times and make a sound.

Here’s how the old steel tube looked. It went from the relief tube on the radiator and bends inward into the passenger side frame engine mount (to avoid contacting the axle).
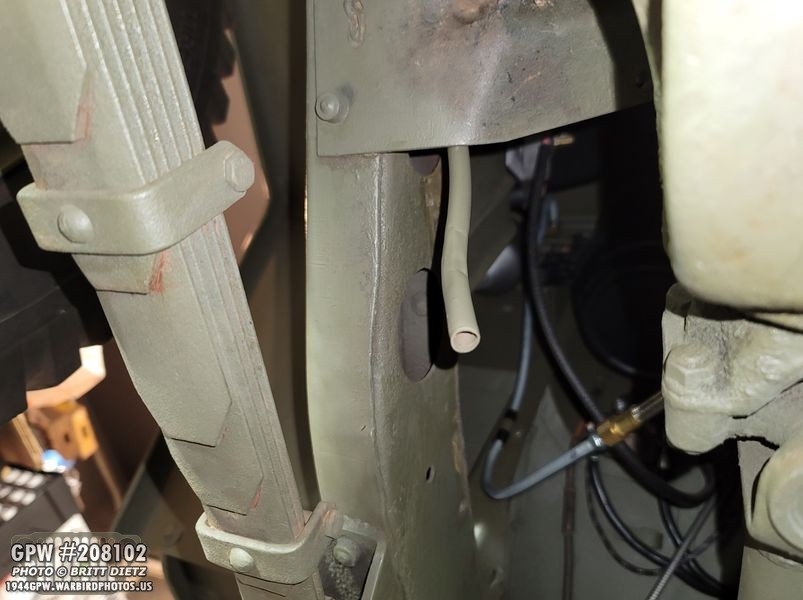
And then it came out the other side of the engine mount and would drip on the ground. This worked well and I planned on keeping it especially after replacing the CJ axles with my freshly restored GPW axles. I didn’t want to ruin that paint job! Even though I’ve done several engine flushes, I didn’t want to risk it turning brown. Well, a problem struck two weeks ago. The steel tube came off during a drive and fell to the ground. Where? I have no idea. UGH. I needed something better.

After hunting several stores, I found a fuel line rubber tube that pretty much fits the relief tube. I got another modern clamp to put it on. I used a punch to widen the clamp end of the tube to help it fit over the relief tube.

This time, it went on a LOT better. It’s about an entire inch onto the relief tube. Even though it’s a modern clamp, it’s hidden enough under the radiator that you would have to know it’s there to see it. Since you can’t bend rubber to shapes like I did with the steel tube…
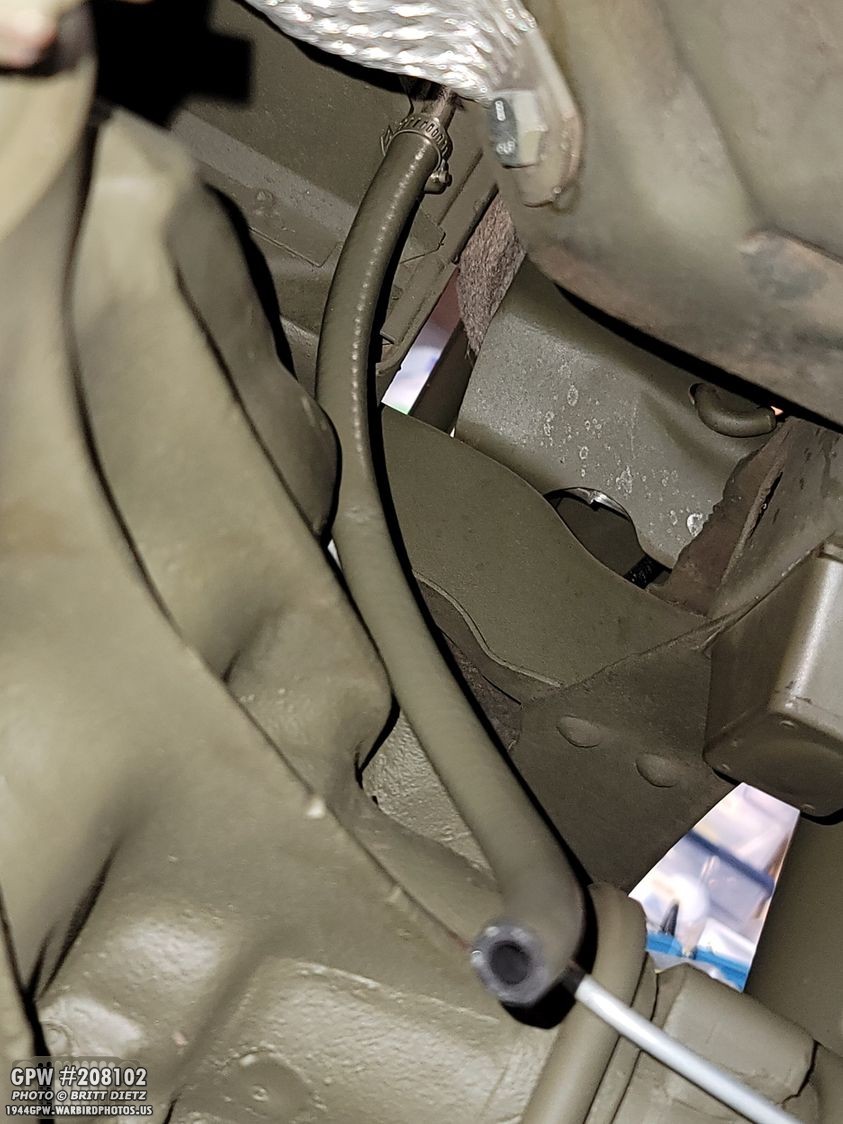
I just let it go down past the front axle. Since it’s rubber, when the axle moves up and down while driving, the tube will move with the axle and not bind. This should be a more permanent solution. While it’s not as hidden as the steel tube was going into the engine mount, it still is tough to see. So win win.

The next project I’m thinking of starting this week is a combination of another flush of the block/radiator and changing out the water pump. Why change it, is something wrong? Nope! I just have a correct GPW water pump and want to install that. The water pump on my Jeep right now is a replacement post-war one (from Kaiser Willys) that I got with the Jeep when I bought it as the water pump that was on it had sprung a massive leak. What’s the difference? Well, aside from the GPW one being F marked and having GPW numbers, the wartime water pumps did not have the two threaded holes shown in this photo.
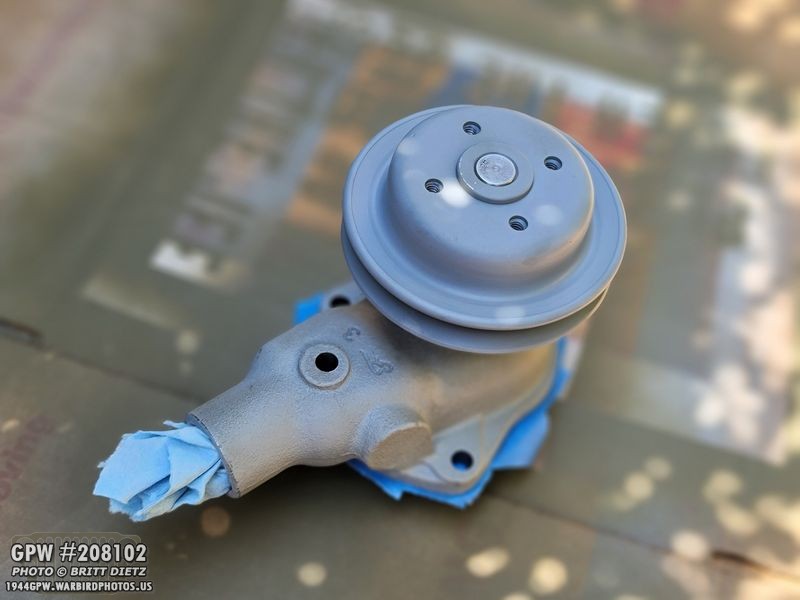
Here’s the GPW one I have in comparison, from Ron Fitzpatrick Jeep Parts. Here I’ve lightly sanded/scotch pad the water pump in prep for painting. It came pre-painted in a Ford engine Gray, but I wanted it to match the same shade as the rest of my engine.

And here it is all painted! The VHT Ford Engine Gray I get is one of the best paints I’ve ever used. Goes on nice and thick, sticks well, dries instantly in hot weather, has a nice protective glossy finish, and repels liquids/oils.
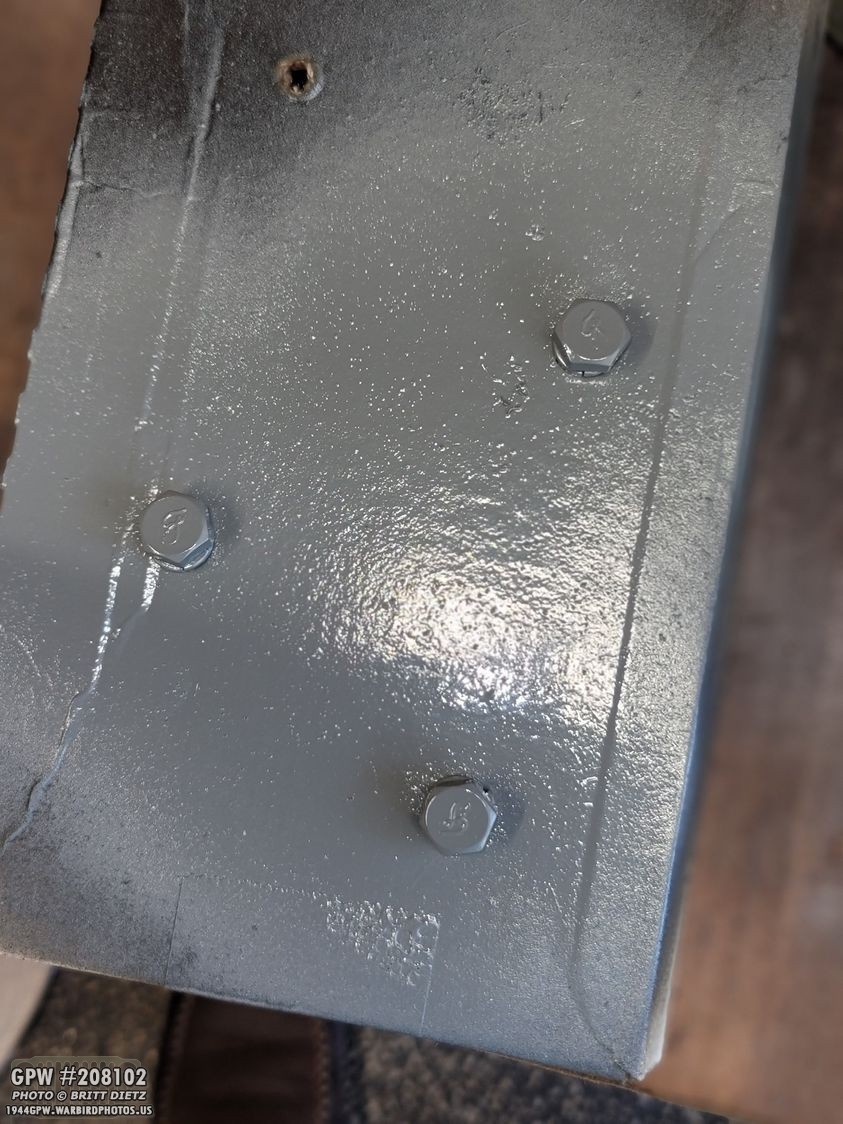
I also pre-painted the bolts for it as it will be difficult to paint the heads once installed with the fan in the way. So this weekend I’ll take off the fan, fan belt, drain the coolant, and start the flush. I’ll then replace the water pump, and get everything back installed.
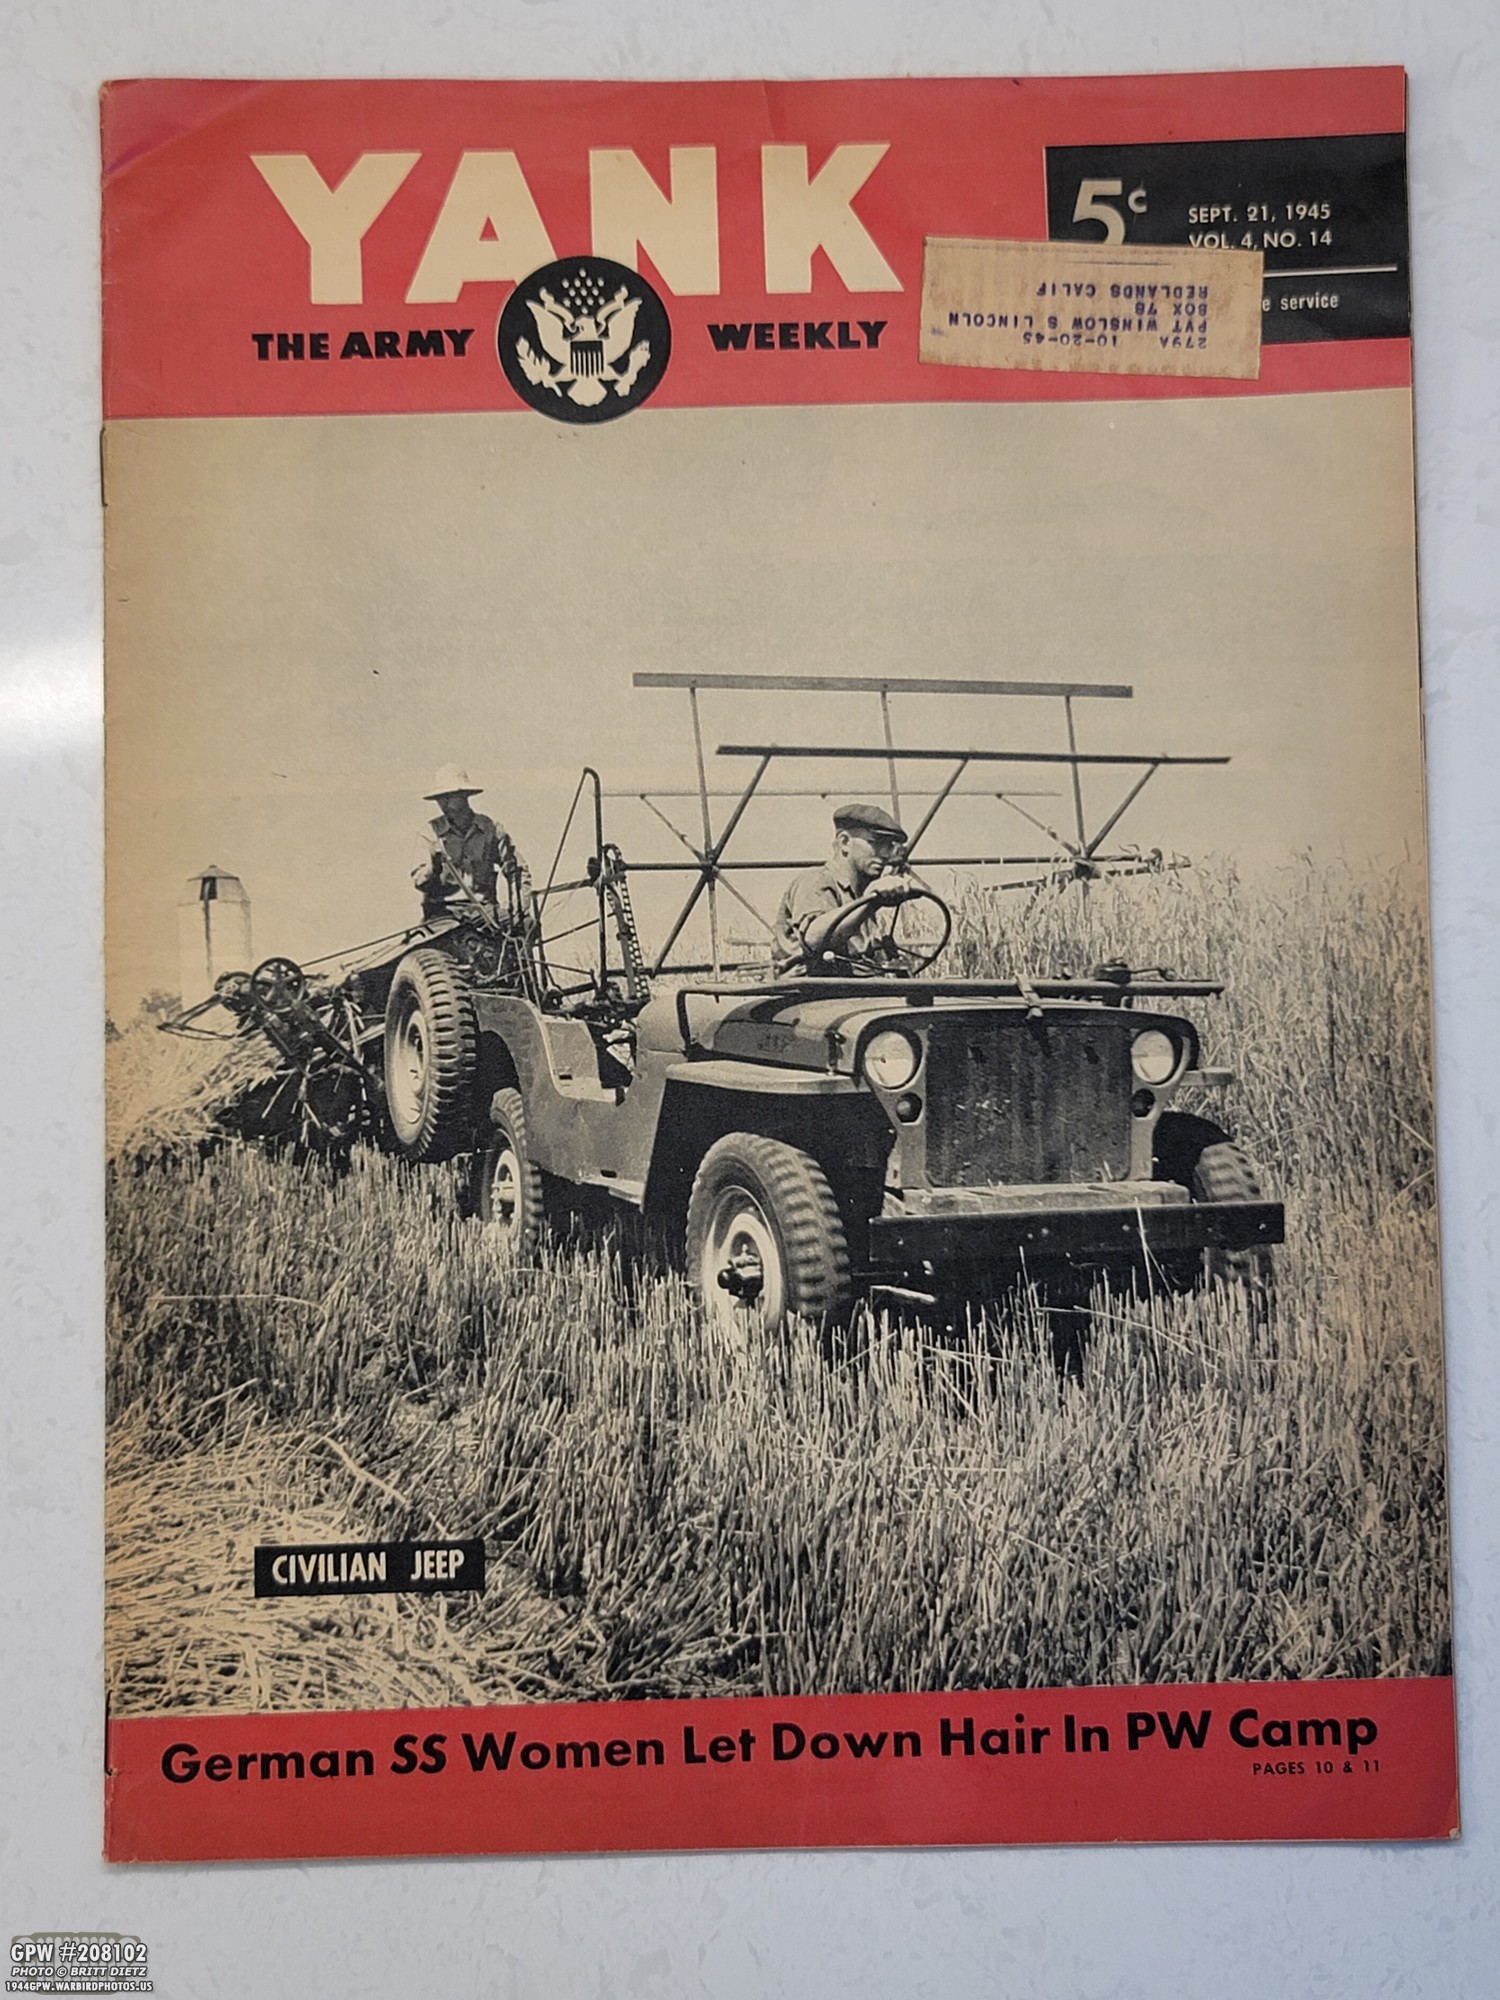
I wanted to show something neat I found at a local flea market two weeks ago. I found an original September 21, 1945 YANK magazine (a WW2 US Army magazine that was available to the soldiers overseas) that showcase Jeeps in civilian use.
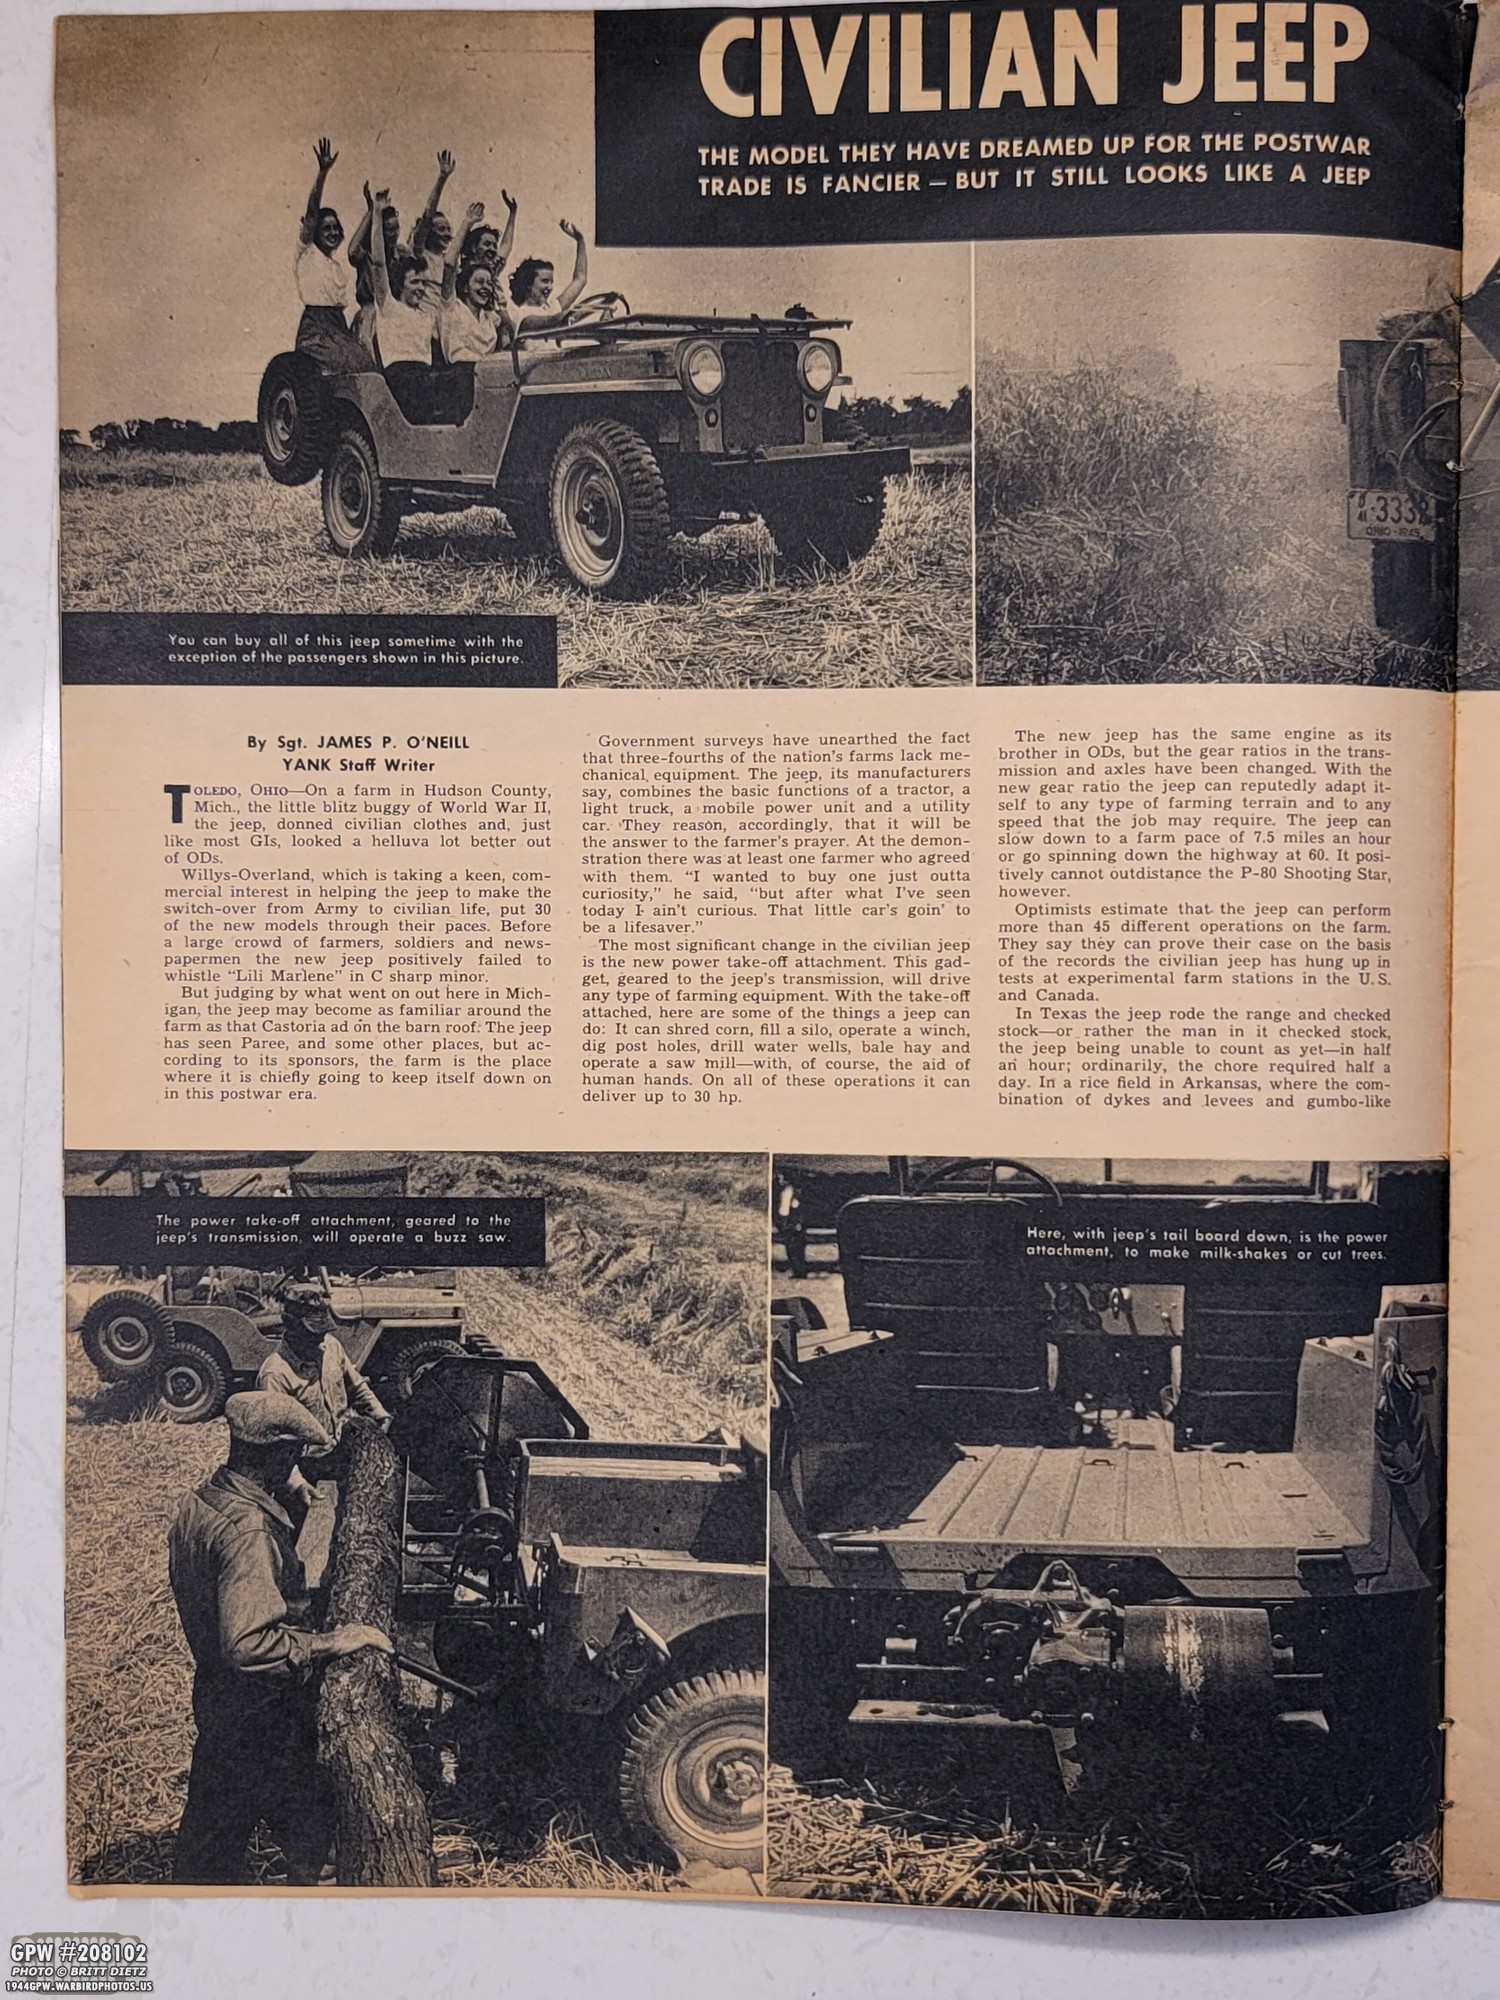
It’s an interesting story about Jeeps built for civilian use by Willys and the changes they were thinking of making. You can enlarge this image to read the article. Page 2 is the next image…

And the second page. I love the quotes from the five GIs who were asked if they would want to own a Jeep after the war.

And that wraps up this update for this week! Another fine addition with the canvas half doors, and soon another post-war item replaced with a wartime style one with the water pump! I’ll also have another update on a few more tests with the clackity sound.
Till next week…