 Starter Issues
All driving of the Jeep was halted last week when it was discovered my starter was sparking and smoking. Upon taking apart the starter it was pretty dirty and had what appeared to be several issues…
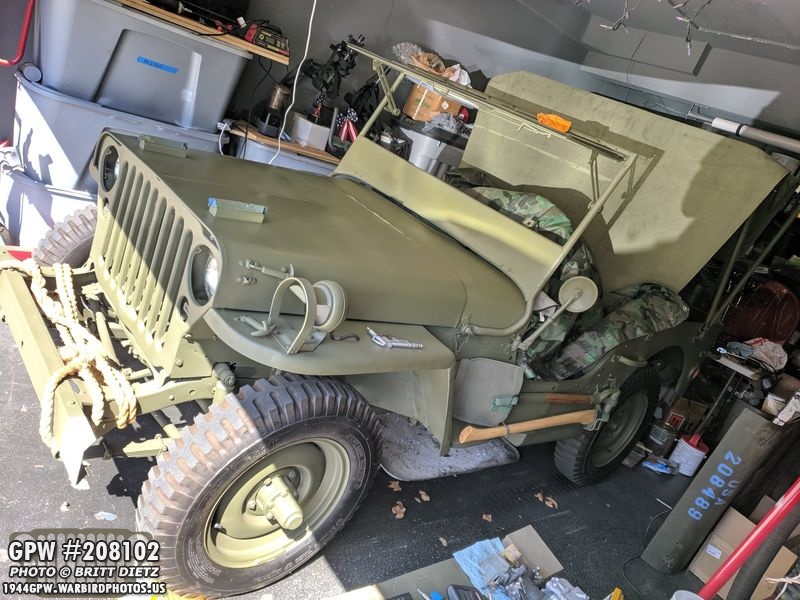
the Jeep is a bit of a mess at the moment as I repaint some things one it… more on that later!

Before getting into the starter issues, I went ahead and made sure all the cotter pins were bent on the clutch linkage. Not the prettiest job with the bending, but it’ll do. Probably should have used shorter cotter pins. I’ll paint them with OD Green.
For the clutch control pedal rod, I put some grease where it rotates in the clutch control tube ears and bent the cotter pin on both sides holding it in. The cotter pins were very difficult to bend with the very tight space.
I touched up the paint on the steering wheel hub. It had a few spots of paint chips from the tape that was on there when I was getting the steering all set up.

I also touched up the paint around the upsidedown bolts on the drill holding the headlight brackets. Since I had to flip them, there was small spots of paint scuffing, so a quick sanding and painting, now it looks great. The area on the lower bolt that is showing metal/primer is actually tinned for grounding the headlight.
Now to tackle the starter, at first I wasn’t sure what was causing the Jeep to struggle to start. It seemed like the starter was struggling to turn, and it would take 2-3 starter button pressings to get the Jeep to start. Originally I thought that maybe the new battery was going dead, since I had been doing a lot of electrical testing and started to drive the Jeep. So I took my battery charger and hooked it up.

I was at 80% power, which told me that not only was the battery good, but the alternator was successfully re-charging the battery as I drove it.

It was around that time, after testing it again, that I noticed smoke coming out of the bell housing (which the maintenance panel is still open) and what looked like sparks from the back of the starter. After immediatly stopping trying to start the Jeep and pulling the power, I noticed the smoke was also coming from under the band on the starter. It was determined that something was wrong with the starter, so I decided to take a look. I removed the starter and though, maybe it’s a bad ground?

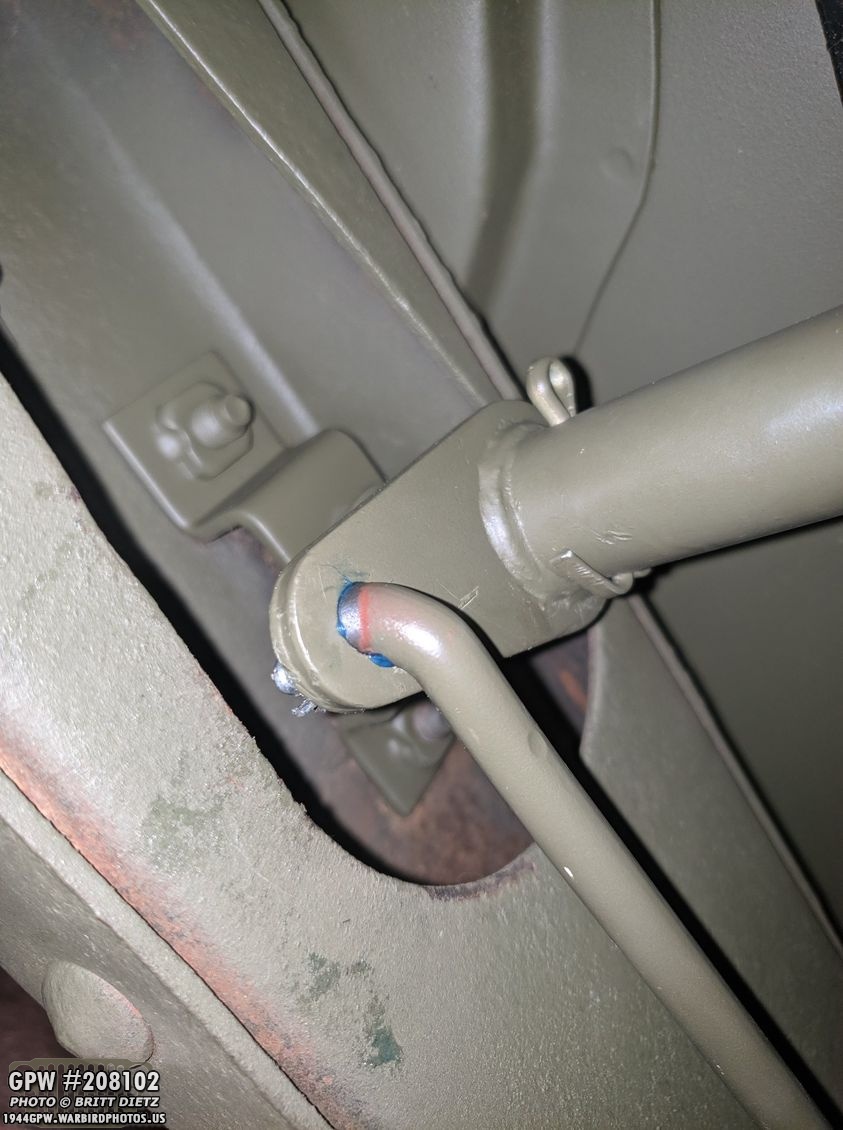
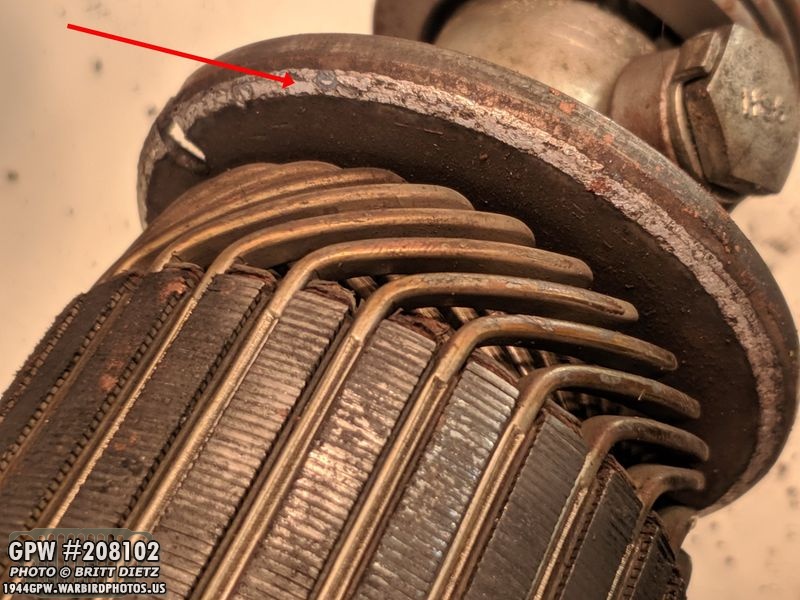
The starter is grounded on three spots, there are two bolts that go into the bell housing (only one seen, which is the yellow arrow) and then the front support that is part of the engine. From there the current would go through the engine and end up in the frame. So I decided to make SURE the starter had as best of a ground as I could.

I took about an hour and carefully sanded metal on all connections, made sure the bolts were free of any debris and paint, and used more toothed washers than I probably needed… but I wanted to make sure it had the best ground possible. Here’s the main front support to engine bracket after I cleaned the metal around the screws where the star washers would be. After putting it all back together and attempting to start the Jeep again… the starter began to smoke again with sparks. So that meant that something else was wrong. I decided to take it out again and inspect it.

I discovered a bit of wear on the back teeth on the starter that connect to the fly wheel. This shouldn’t cause any performance issues at the moment, but the starter has clearly been used for a long time.
Looking inside the rear housing, there was a good layer of debris and gunk in there. At this time, it was decided I should open it up so I could see if anything was wrong inside. I was originally thinking I would just clean everything and put it back together.

I started by removing the band (already removed) and then carefully sliding off the cover. It’s a bit tricky getting this off, as there are brushes that are kept in brackets on the cover with springs that need to be carefully pulled out and separated.

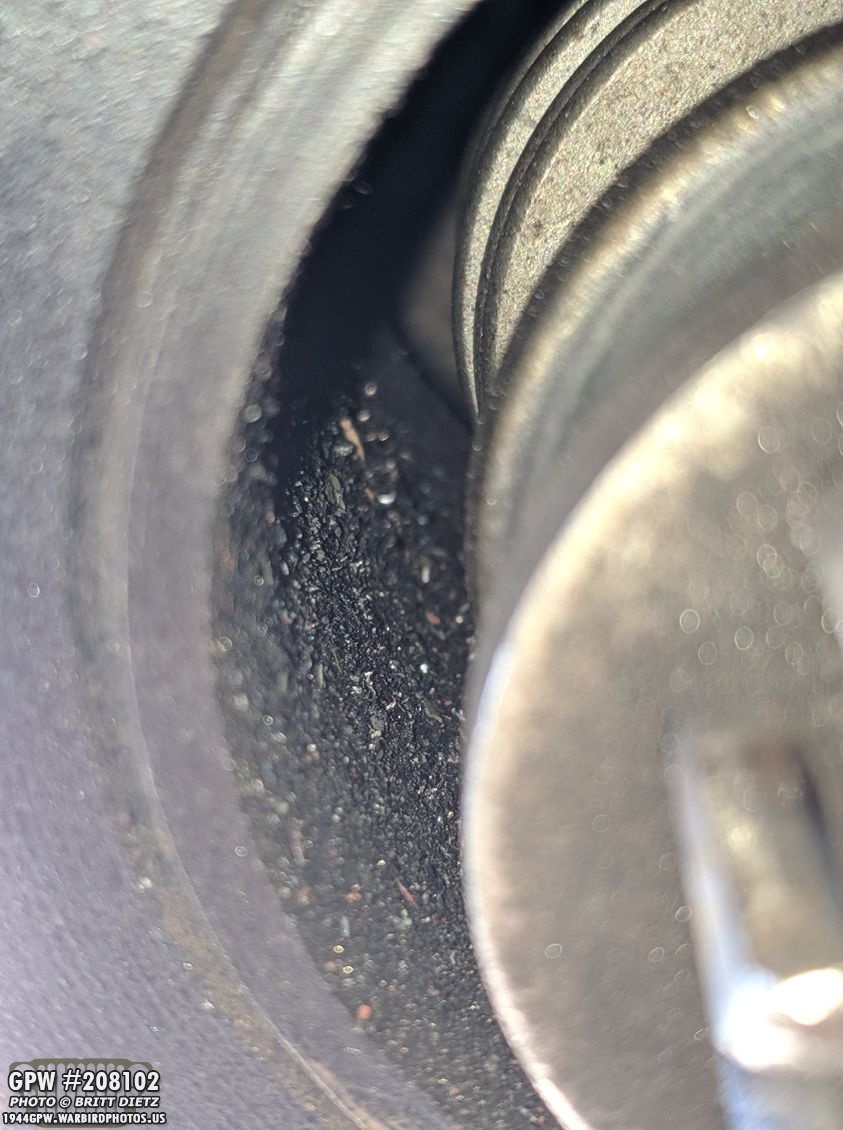
Here’s a look at the band. There’s a LOT of rust/gunk stacked on the inside. I’m starting to think this hasn’t been opened in many years.

Here’s a look again at the cover. You can see one of the four coiled springs that hold the brushes to the armature. Using needle-nose pliers, I was able to pull out the spring ends enough to then, with the other hand, pull out the brushes.

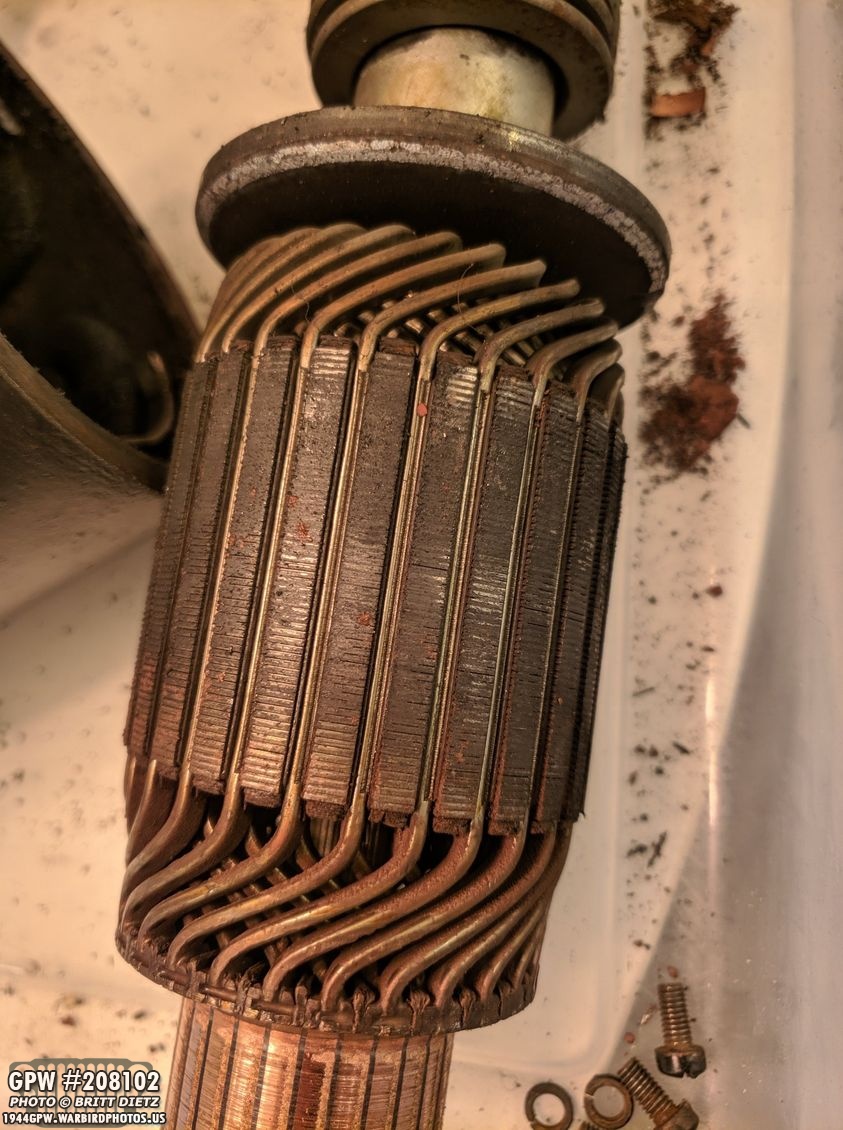
With the cover removed, you can see the armature and the two positive brushes.

There’s a bit of wear on everything, and it’s all pretty dirty. So much debris fell out of the starter once it was opened.

Close up look at one of the positive brushes that ride against the armature. Quite a bit of wear on it.
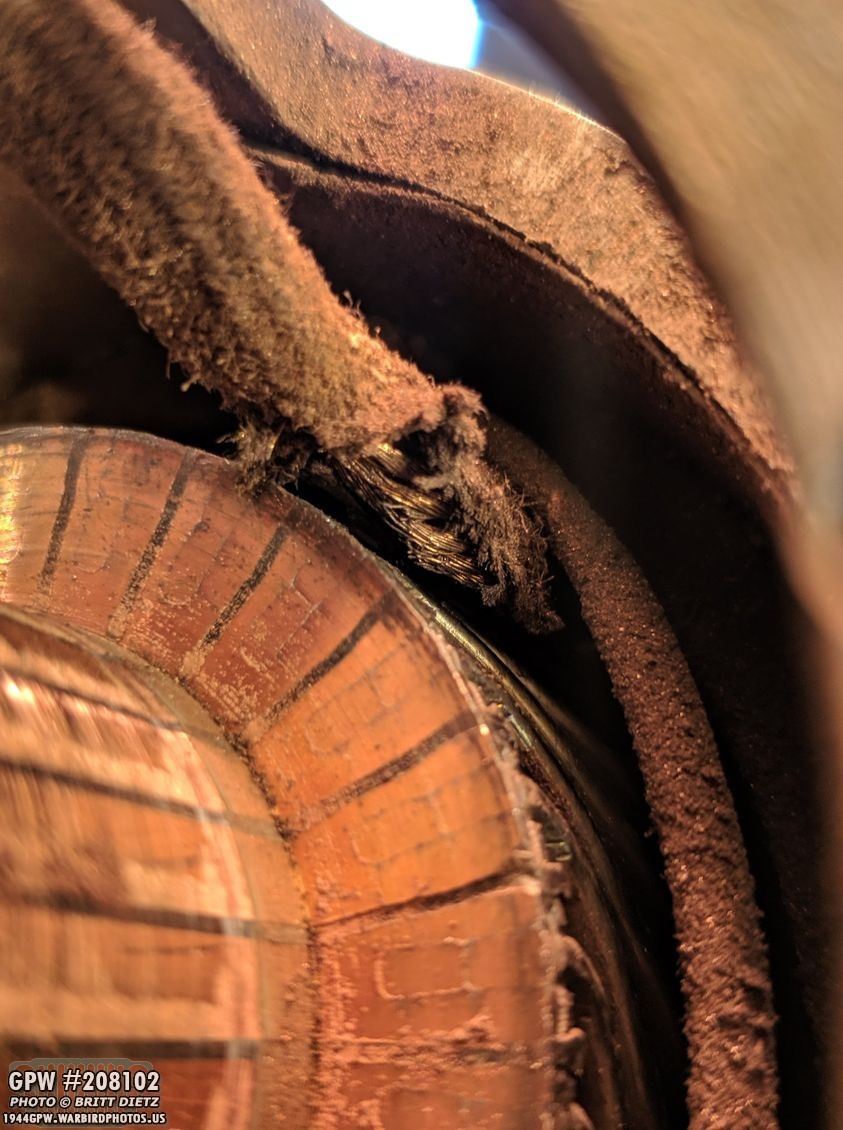
First issue I noticed, one of the brushes has wire exposed that could be contacting against the armature. That outer cloth jacket around that lower part of the brush has rotted away. Easy to make contact and possibly short it out.

Here’s a wider look at the brush with the exposed wiring. you can also see just how incredibly dirty this starter is on the inside. I’m thinking it hasn’t been opened EVER. I might be the first person to open it since WW2.

Here’s a look at the cover. You can see two other brushes, which are ground brushes (top and bottom), still in their brackets with the springs holding them in. The left and right empty brackets are where the positive brushes were.

After removing the rear housing, I can now see the bendix motor drive. This all looks in pretty good condition actually.

Looking inside that rear housing, however, there’s a lot of debris and even little copper flakes, possibly from the brushes.
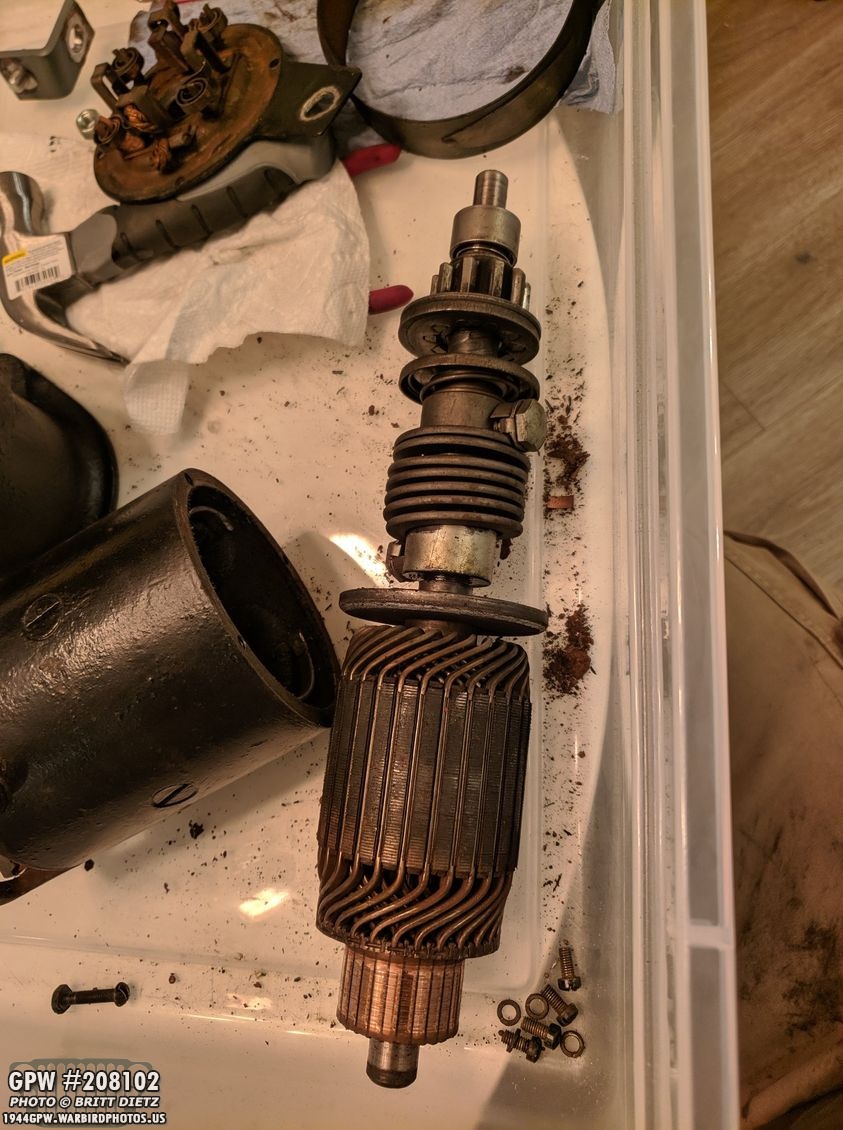
Here’s the armature and bendix drive all removed from the front and back housings. As you can see, so much rust dust and other debris has come out.
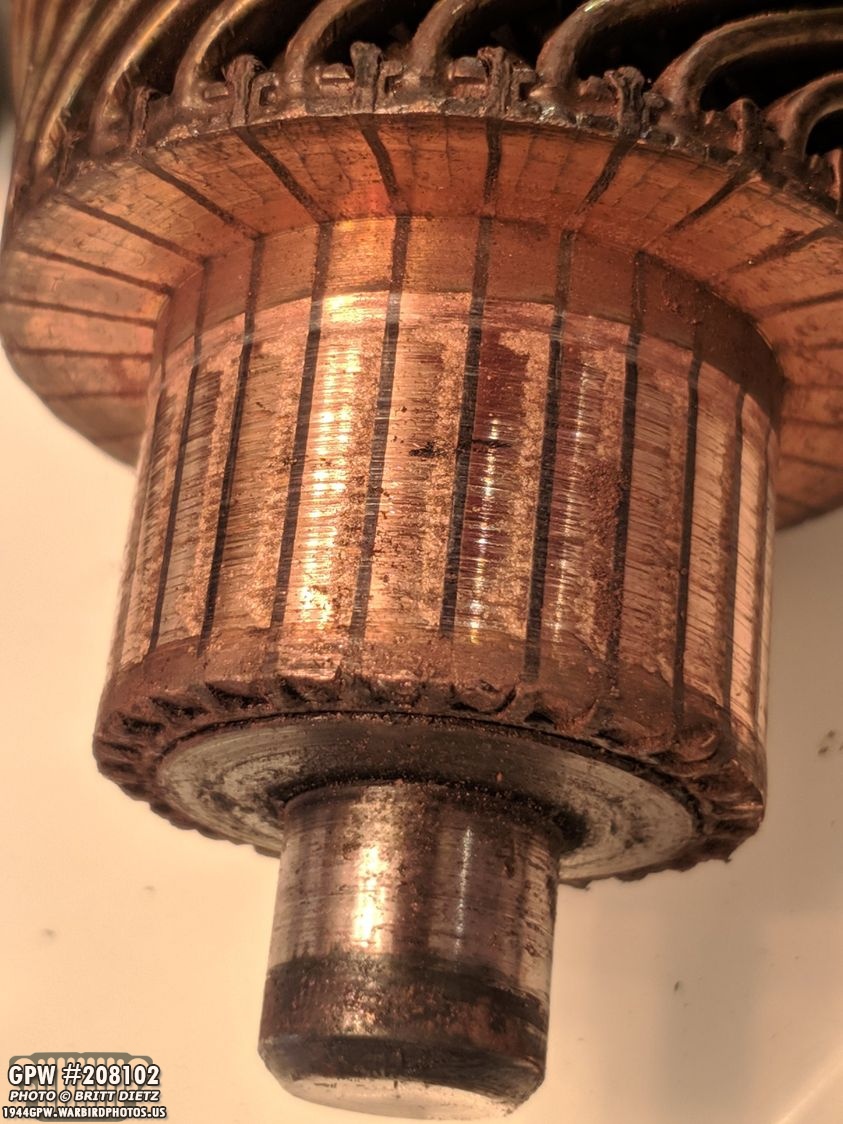
Here’s a look at the front of the armature. There’s a lot of wear from the brushes. This is where all the little copper specks have come from, I’d imagine.
The main part of the armature has a lot of grim on it.
I noticed what looks like some sort of scarring or residue on this outer ring.I’m not sure if it’s been contacting with something but the metal is scraped.
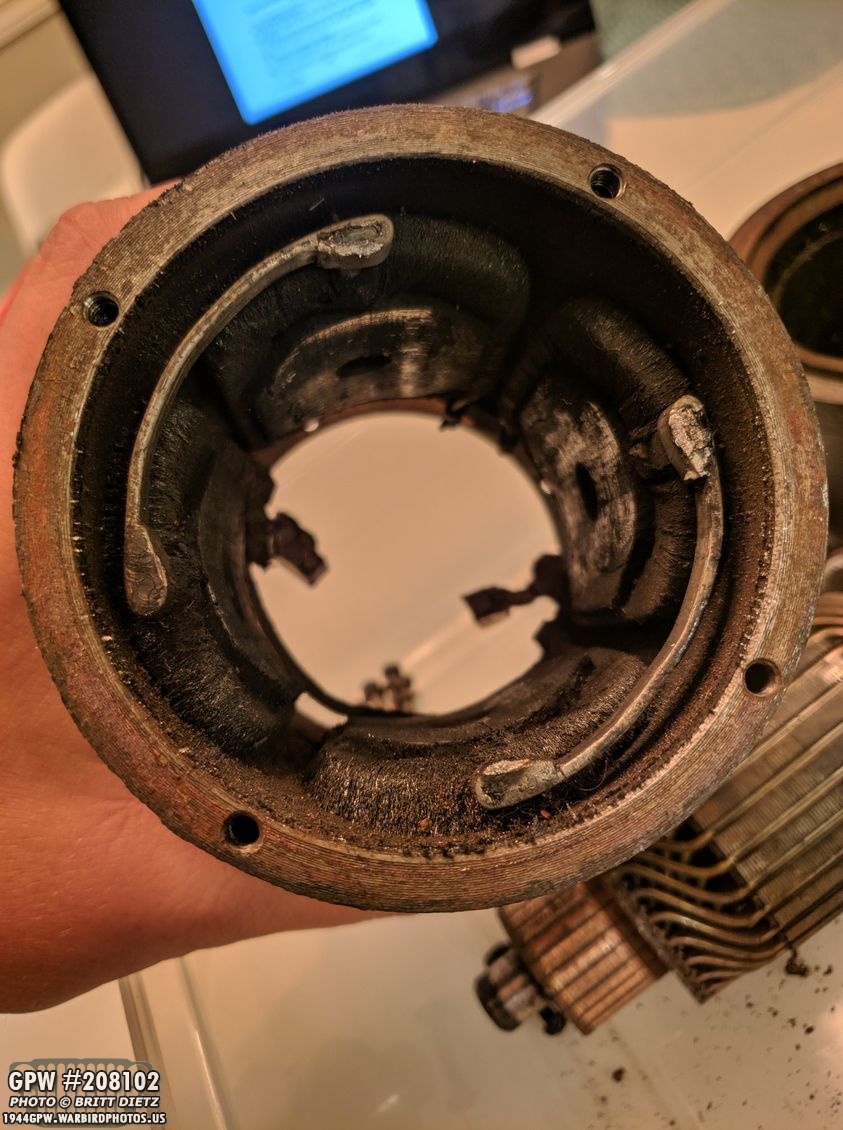
Here’s a look inside the main housing that has the coils. It’s REALLY dirty.

The two metal bars that connect the coils (there’s two, only one is shown here) have fresh metal that looks like it’s contacted something or shorted our sparking. Possibly that back ring I mentioned? This could be the another cause for the shorting out and sparks.
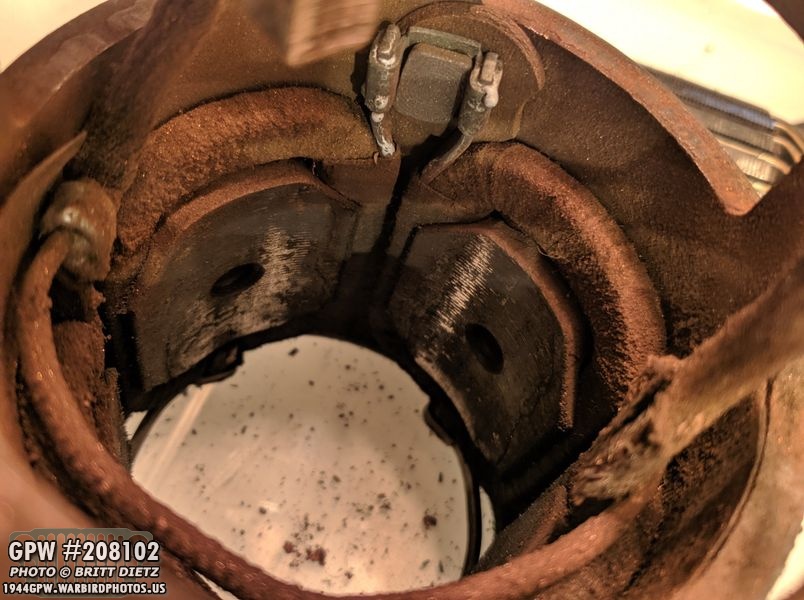
Looking at the other side of the housing, we can see how dirty those coils and pads are. I’ve been told that these were originally coated with varnish. Once that varnish is gone, that can also cause shorting.

Another look at that exposed wiring from the brush and the filthy coils.

Here’s the entire starter taken apart as far as I wanted to go. I could remove even more, like the positive brushes, the coils, and take apart the armature/bendix drive. But after showing all these photos to Roger and Tom, both said I should go ahead and look into a full rebuild. Sadly, most places I looking into that could actually rebuild a WW2 AutoLite starter said it could take 2-3 weeks or more. I honestly don’t want to wait that long to get this fixed, Especially since I’d like to possibly drive the Jeep in a Veteran’s Day parade, which is coming up fast. So I decided to purchase a rebuilt original starter from Ron Fitzpatrick Jeep Parts and send in mind as a core. The amount of time it would take to clean everything REALLY well, replace the brushes and bushings, try to track down the cause for the shorting, etc would take almost as long as it would getting it rebuilt. I’m not even sure this is an original wartime starter (the date stamp on the data tag is long gone), so I’m okay with swapping it for a professionally rebuilt original.

Ron Fitzpatrick from Ron Fitzpatrick Jeep Parts suggested I keep the band from my starter and use that with the rebuilt one since theirs don’t have datatags. Not sure of how the paint job on the rebuilt ones from RFJP would look, I decided to clean mine up. The datatag was almost completely rusted away, aside from the deeply stamped part id. Everything else was too far gone to get back, but after sanding it I could faintly see AUTO LITE barely there.
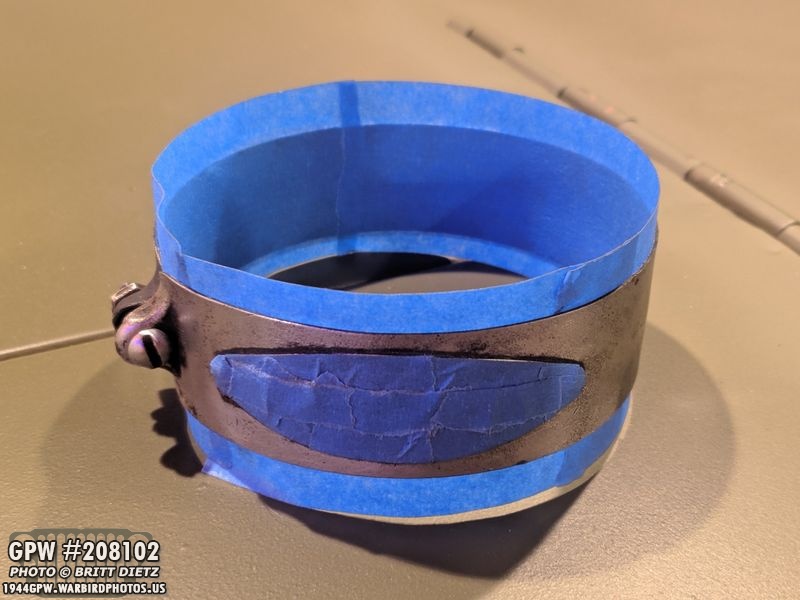
Masked off and ready for primer…
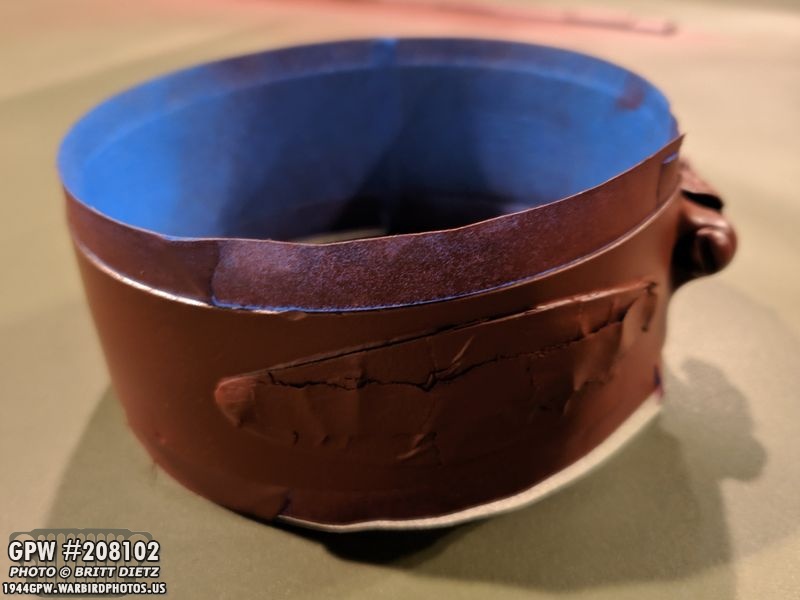
All primed! I’ll wait until I get the rebuilt starter before I hit it with black. That way I can attempt to match the paint jobs.

Speaking of painting, I took some of the time to repaint the bell housing maintenance door. It had gotten scratched up a bit when I was trying to reinstall/align the clutch fork.

One thing that had majorly been bothering me was the paint job on the hood and cowl areas. I hastily painted the hood back in June when I was trying to get the Jeep ready for the vehicle event. Originally, I was only going to use the reproduction hood until I could repair my hood. After it was found that my hood was too far gone to repair (a permanent droop and cancerous rust that would be almost impossible to fix), I realized this would be my hood until someday, when I could find an original F stamped hood. I attempted to repaint it on Wednesday, but that was met with failure as the new 33070 paint I was using from Ron Fitzpatrick Jeep Parts (gallon form) didn’t seem to play nice with my air gun and left a mess in the form of paint dust, overspray, and the ‘orange peel’ texture’. I spent 3 hours later in the day sanding the hood and cowl to remove the terrible paint job.

The next day, I mixed the Ron Fitzpatrick Jeep Parts 33070 and the RAPCO/Gillespie 33070 (which I only had a little left) and gave it a bit more thinner. I tested it out on some scrap metal and got it to go on a lot better. So I held my breath and gave it a go… to great results! Here it is painted (keep in mind it’s wet in this shot, so it’s a bit reflective thus not looking uniform). I think it’s pretty uniform now and matches my original Gillespie 33070 paint job. We’ll see in 24 hours!
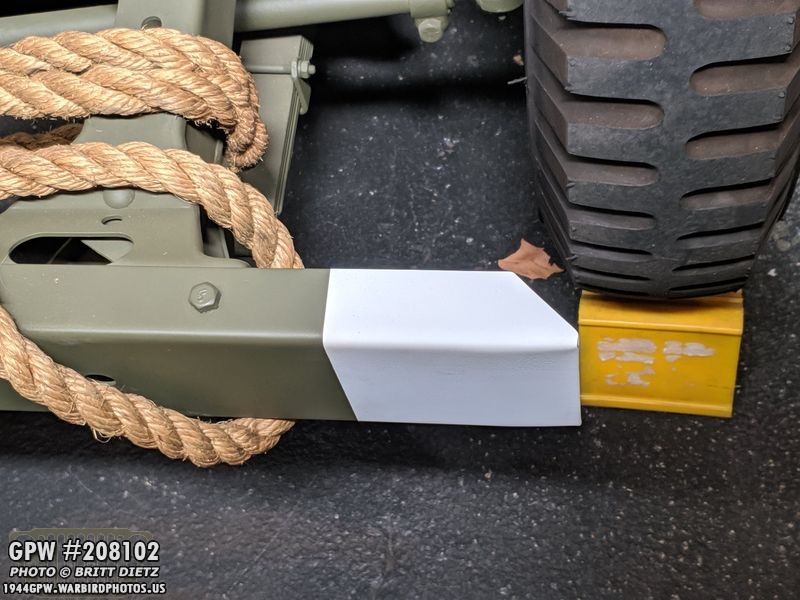
I also took the time to ‘refresh’ the white paint tips on my front bumper. These white tips are Army Air Force style, and the tops had gotten some OD green overspray from previous touch-ups last month on accident. They also seemed to yellow slightly from the direct sunlight. I might need to put a protective overcoat on them to keep them from fading. But regardless, looks better now!

Finally, ending with the photo that started this week’s update, here’s how the Jeep looks. A bit of a mess as I had to take down the canvas top (first time since I installed it!) so I could paint the hood and cowl. I also touched up the windshield, so I opened the inner windshield so I wouldn’t has to mask the glass. The rubber weather seal under the windshield is also removed as the paint dries. The camo tarp in the Jeep is protecting things from any overspray. I get the new starter today (Friday), so once that’s installed and tested, I’ll put the jeep back together and hopefully be able to drive it again Saturday! Until next week!