 Christmas time for the Jeep!
This past week (and a few days) have been filled with Jeep work any second it wasn’t a holiday! I continued work on the front springs, shocks, and propeller shaft in prep for installing the front axle! Most of this week was cleaning/wire wheeling things and discovering what all I had on the Jeep. I also continued my ‘custom F stamps’ for bolts. Lots of work!
Hard to believe this was a year ago! The Jeep has come along so much in a year’s time, mainly due to all the extra time I’ve had from staying at home because of the pandemic. I look forward to when the current axle swap project is finished and I can do another ‘before and after’ photo series.
Where we left off last week I had removed the front shocks, springs, post-war CJ axles, and drag link. It was time to get to work wire wheeling and sandblasting things to see what I have!
First up, the springs. The front springs are a bit shorter than the rear ones. If you recall from two weeks ago, the rear springs were indeed original GPW springs, and appear to be original to the Jeep. I’m hoping the same for the front springs. I knew they were GPW springs, as they had scalloped edges on each of the leaves.
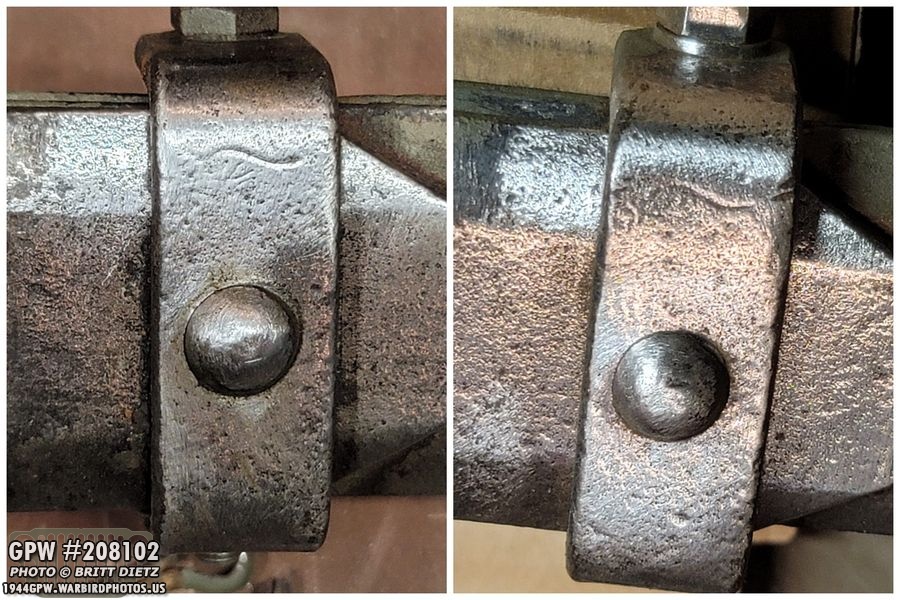
Aside from the scalloped edges, the other way to quickly tell is to wire wheel the clips. These are the GPW style clips that use bolts (rather than MB clips that fold around and lock together without a bolt). Sure enough, two of the clips on the first spring I started wire wheeling did indeed have partial F stamps!
The other spring’s clips were too pitted, sadly, for me to see any F stamps, but I managed to find this partial one on one of the smaller end clips.
Next step was to remove all the bolts from the clips. They came off pretty easy, but there’s a reason why…
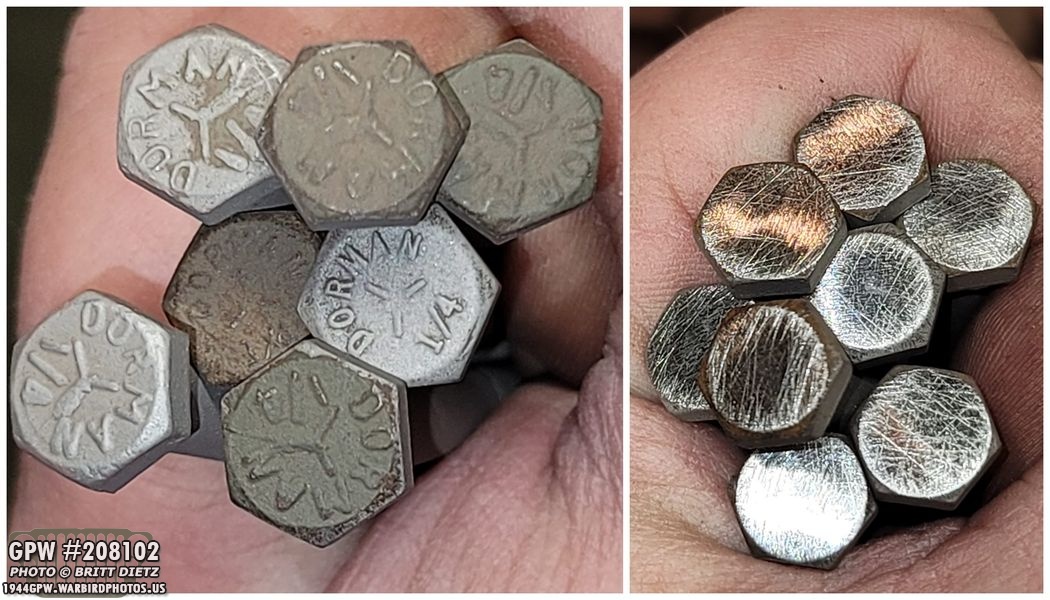
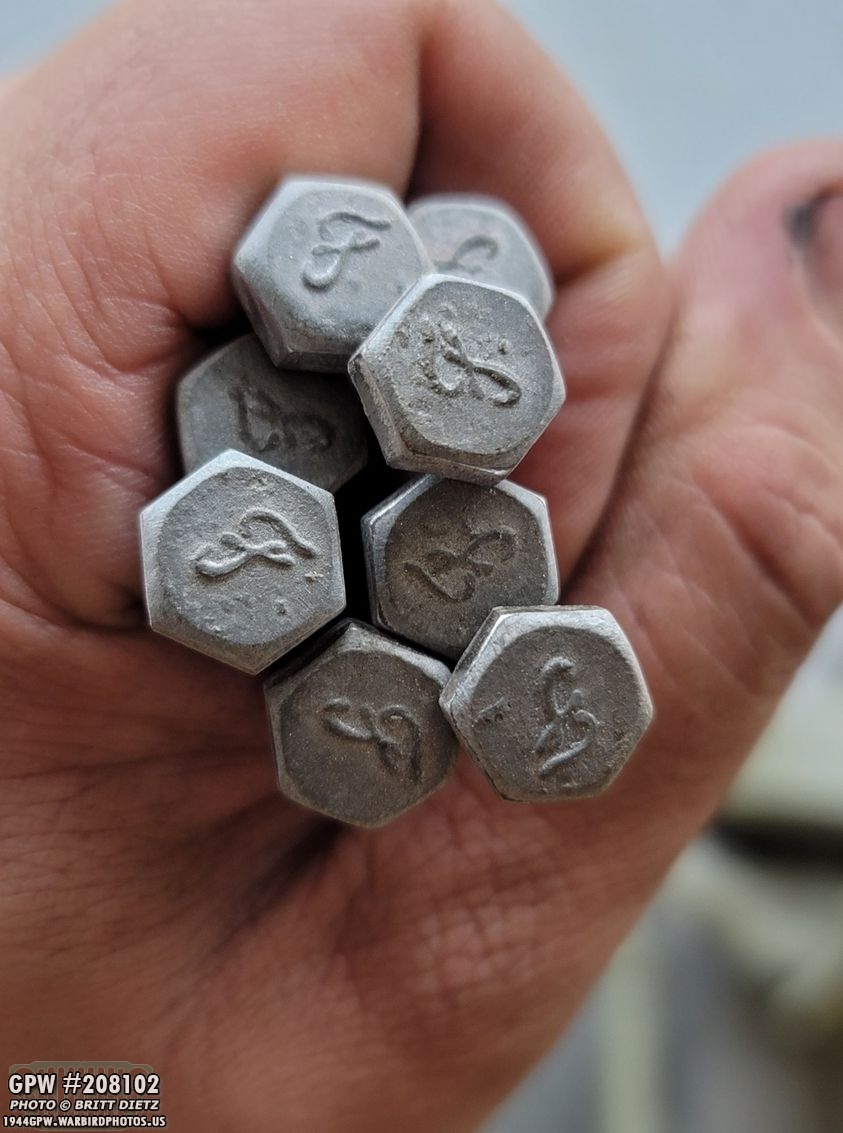
These are post-war Forman bolts. Who knows when the original F marked bolts were removed in the Jeep’s life. So, like I did with the rear spring clip bolts, I went to work adding F stamps to them. I, as usual, first used my belt sander to grind off the head markings, then I scuffed them up with 60 grit sandpaper.
I then sandblasted the bolts to clean off the paint.
And one by one, I put a small ball of JB Weld Steel on the head, pushed it flat, then pressed it into my custom F stamp mold I made. I covered this entire process (and how to make the molds) a few updates ago.
After letting them harden for 24 hours, I used a sandpaper block and sanded the excess JB weld and sanded them at an angle to give it a raised look. I’m getting better at this each time I do these. These are my best yet.
Focusing back on the springs, I needed to remove the grime and grease accumulated on the spring ends. So I dunked them both into my ‘bucket o’ fuel’ for several hours. (Again, that’s a bucket of gasoline for those who are new to the page. Works AMAZING to clean this stuff up).
Case and point, here’s how it looked once I took it out! It’ll still need some slight wire wheeling, but it’s a huge help.
I went ahead and grabbed the 13mm long socket to drive out the old bushing in this spring. Took some force, but it came out as the rear spring bushings did.
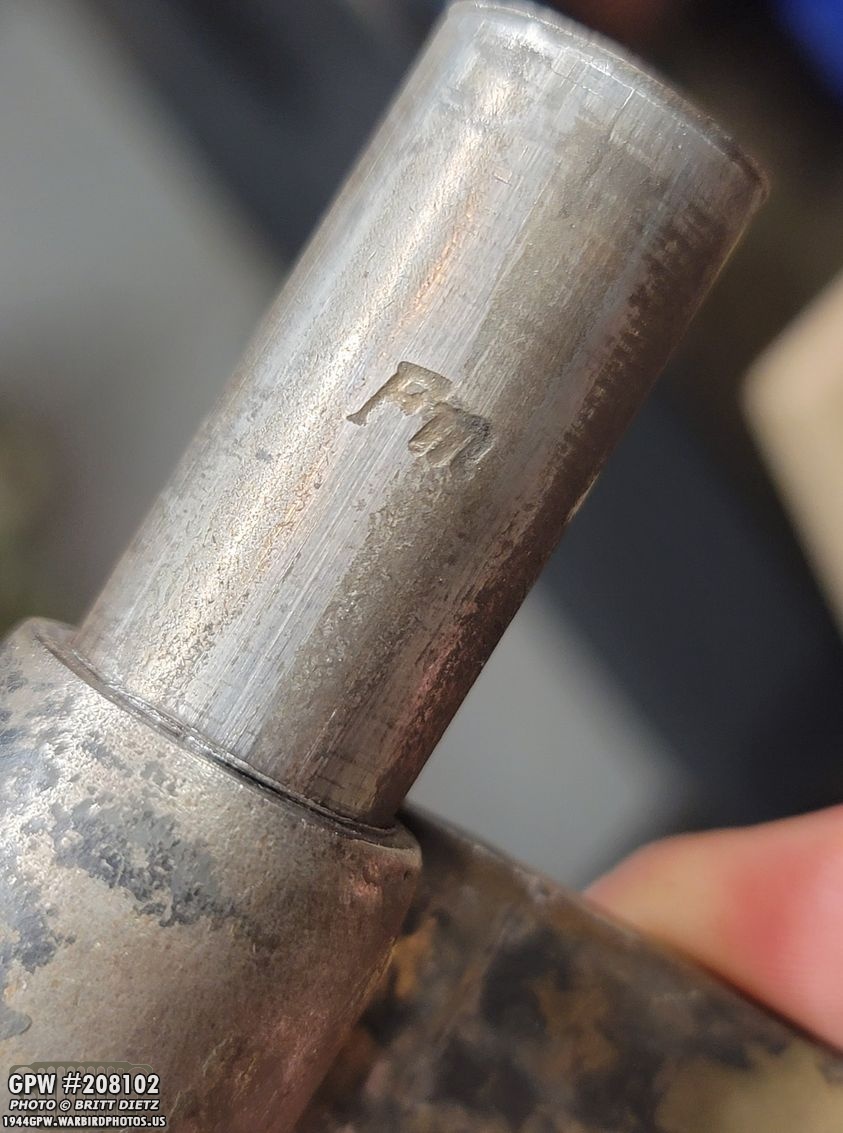
One thing I noticed was that the bushing coming out, which I assume is original, has Fm marked on it. I decided to look at the other bushings from the rear springs to see if they had it too..
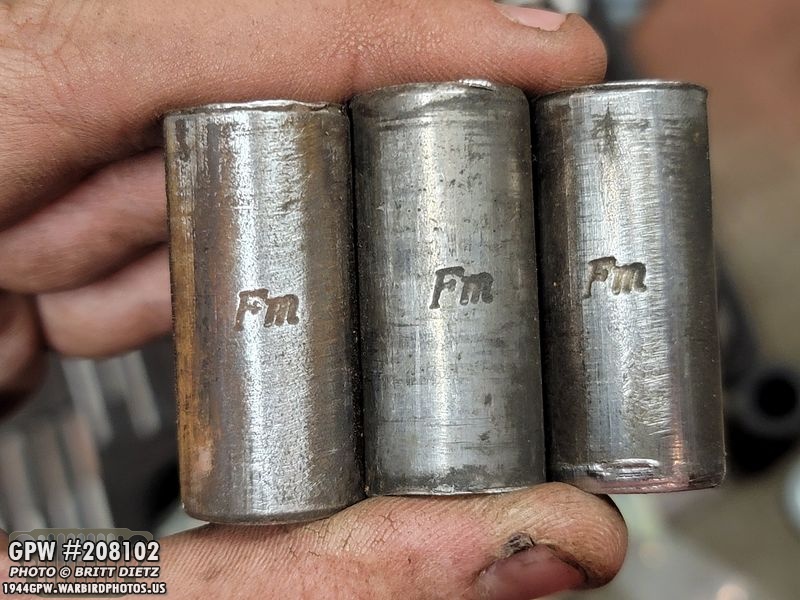
Sure enough, after some cleaning they do. Again, I assume these are original, so wonder what they mean? Ford Motor? That seems odd. Any ideas out there?
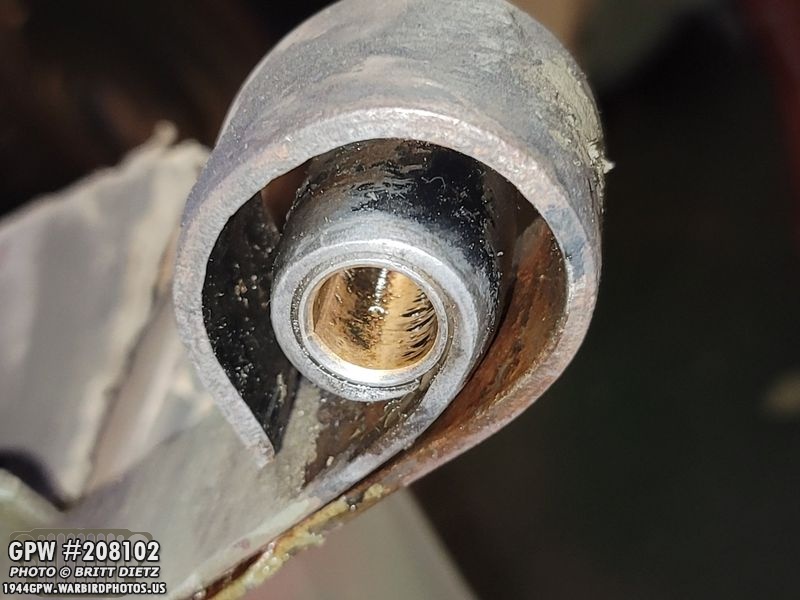
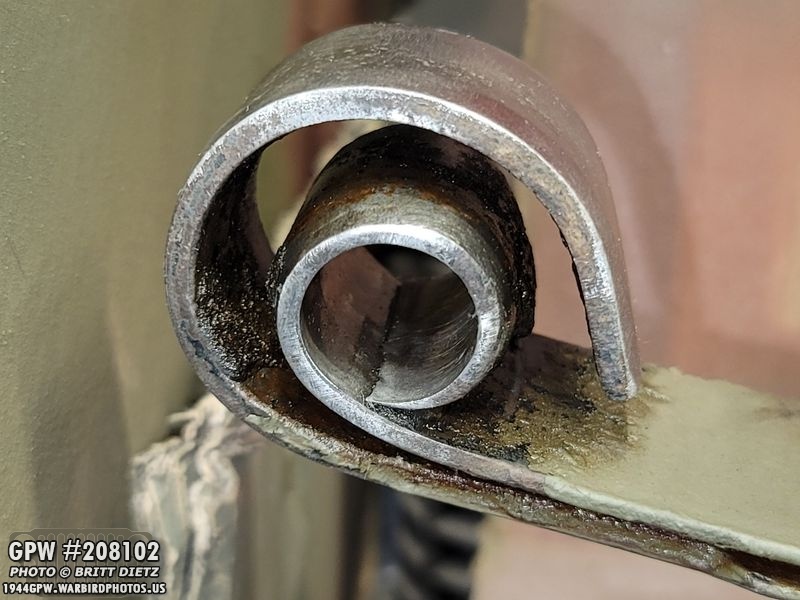
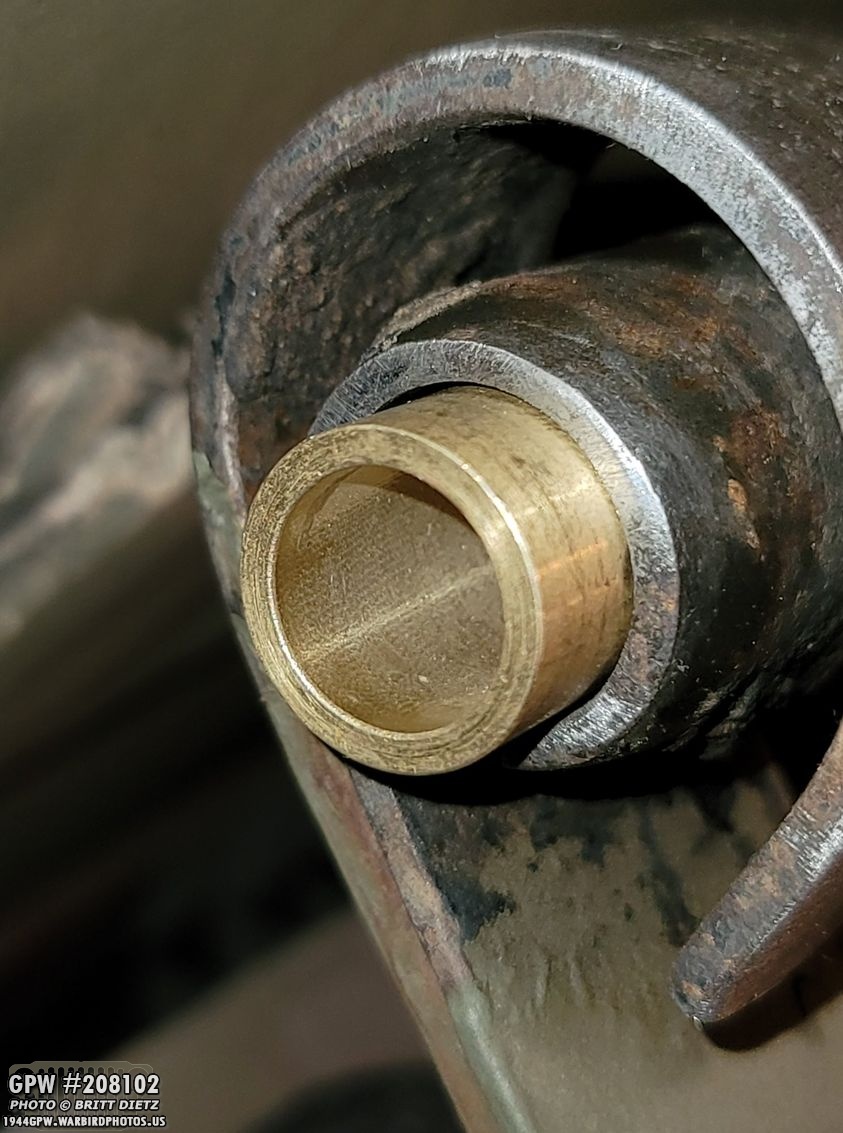
So I moved on to the other front spring and soaked it in the gasoline for a few hours. Here’s where the trouble began… as I was taking it out, I heard a ‘ kerplunk’ as something fell off the spring and into the bucket. Whaaaa? I looked at the bushing end, and spotted this. Where’s the bushing?!
I went and grabbed one of the new replacement bushings and pushed it in… and it went through the other side without any resistance. What?! Apparently, it was the bushing that fell out into the bucket of gasoline. What’s going on?!
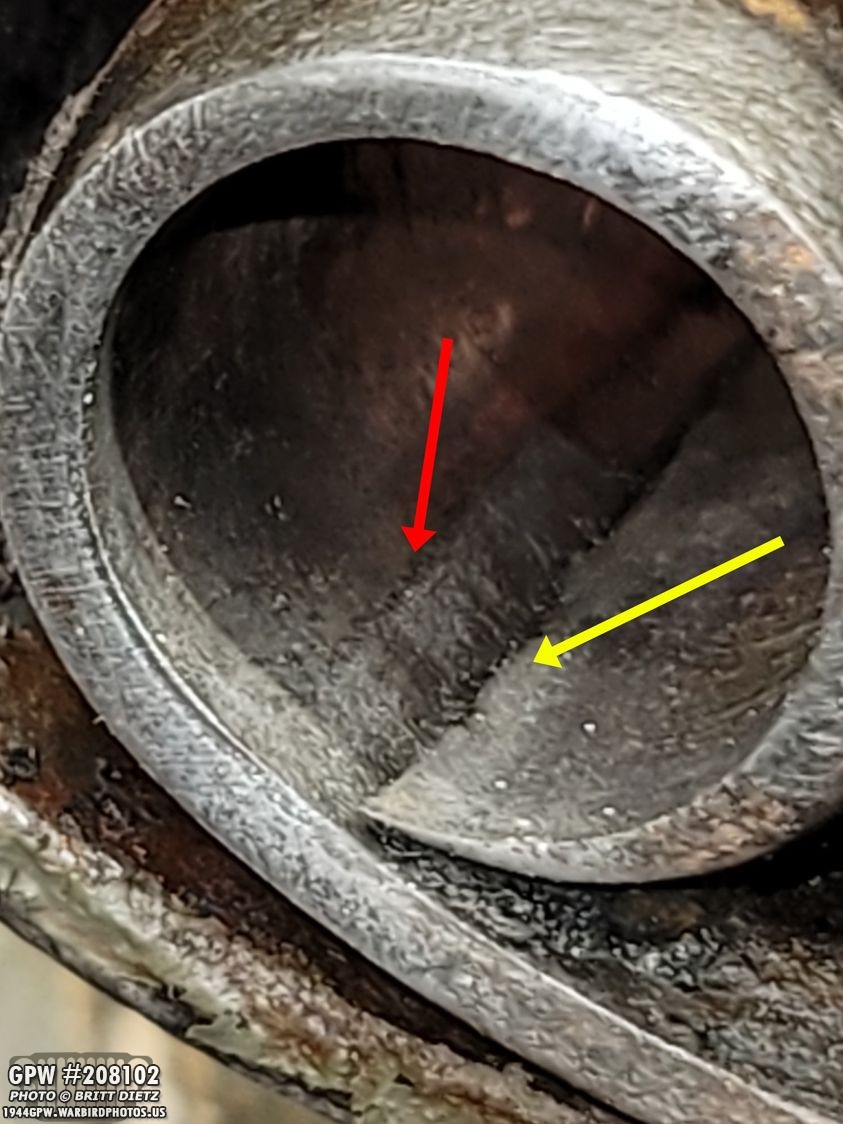
Well, in case you haven’t figured it out yet, here’s a photo showing what happened. Somehow, the curl had come uncurled a bit, meaning the bushing was only being held in there by the grease and dirt that’s accumulated for over 76 years. Once the gasoline broke that up, it just fell out. Looking at the curl, you can see how much it’s moved. The red line is where it should be curled to, but the yellow line shows where it actually is. UGH.
I was then left with a few options… 1) I could buy a whole new repro front spring. 2) I would take apart the spring and just replace the #1 leaf with the curl. 3) I could take apart the spring and try to hammer the curl back into place. I decided to try either #2 or #3 of the options, which mean taking apart the spring. This would be the first time I’d taken one apart, so I sorta looked forward to the process. First, I put marks on the springs to know which way they were oriented.
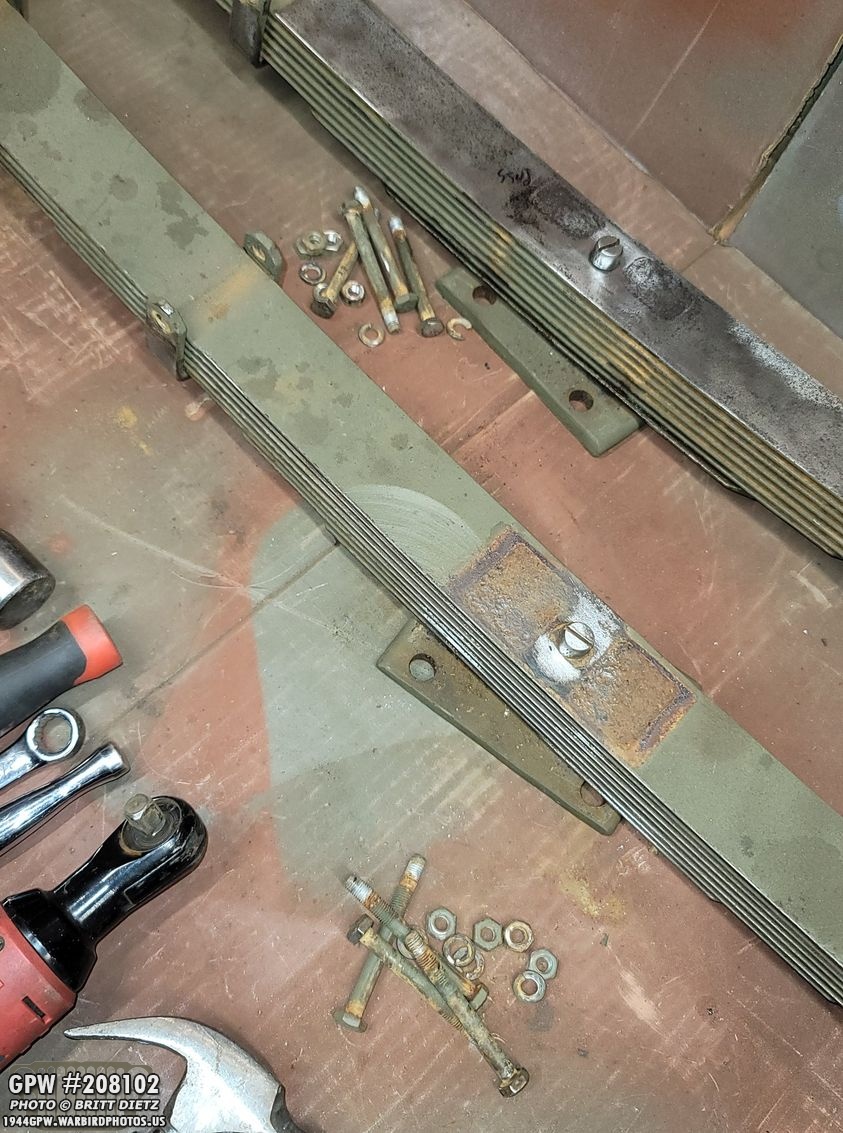
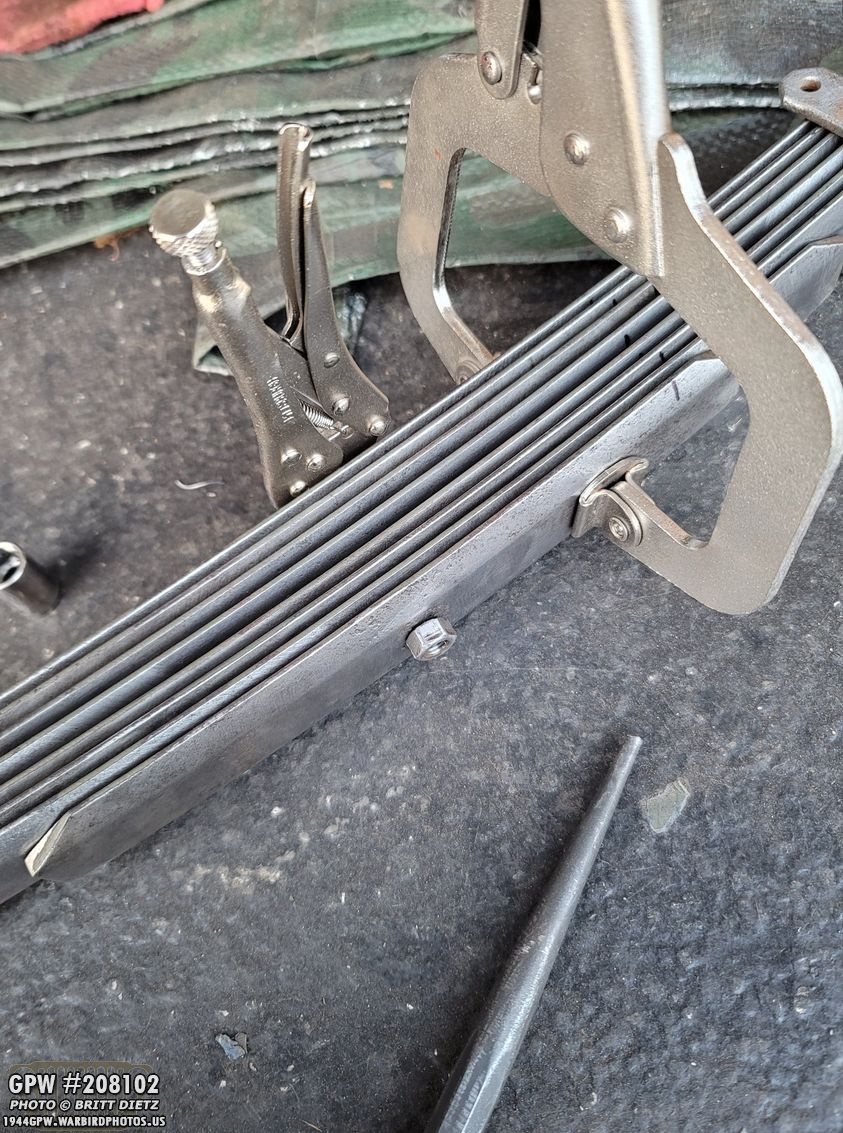
I didn’t take too many photos of the process, as it was a bit of busy work… but I soaked the center bolt and nut holding the leaves together with PB Blast for a full day. I then used a clamp to really tighten on the bolt head (yes, it has a slotted head for a screwdriver, but trust me that I was going to destroy that slot well before that nut would have come loose). With that clamp squeezed as tight as I could on the head, I was able to slowly undo the nut. I used a C clamp to keep all the leaves together so they wouldn’t rapidly expand. Once the bolt was off, I slowly opened the C clamp, which slowly expanded the leaves.
Here’s a look once I got the bolt out and the leaves had expanded.
I called around, and no one had a spare GPW spring I could steal/buy a #1 leaf from. I thought about just buying a $90+ repro front spring and swapping the #1 leaves, but Tom Read said, why not try just hammering it back closed? I figured, why not, I’m getting rid of it anyway. I tried using the C clamp to squeeze it closed. Wouldn’t budge. I tried putting it in my vice and squeezing it closed, curl didn’t move. Roger Smith said, beat it with the biggest hammer you have. So I got a 5-pound metal mallet and smashed it like I hated it. Guess what, it MOVED! Not only that, it worked, it curled it back into place after the 5th hit!
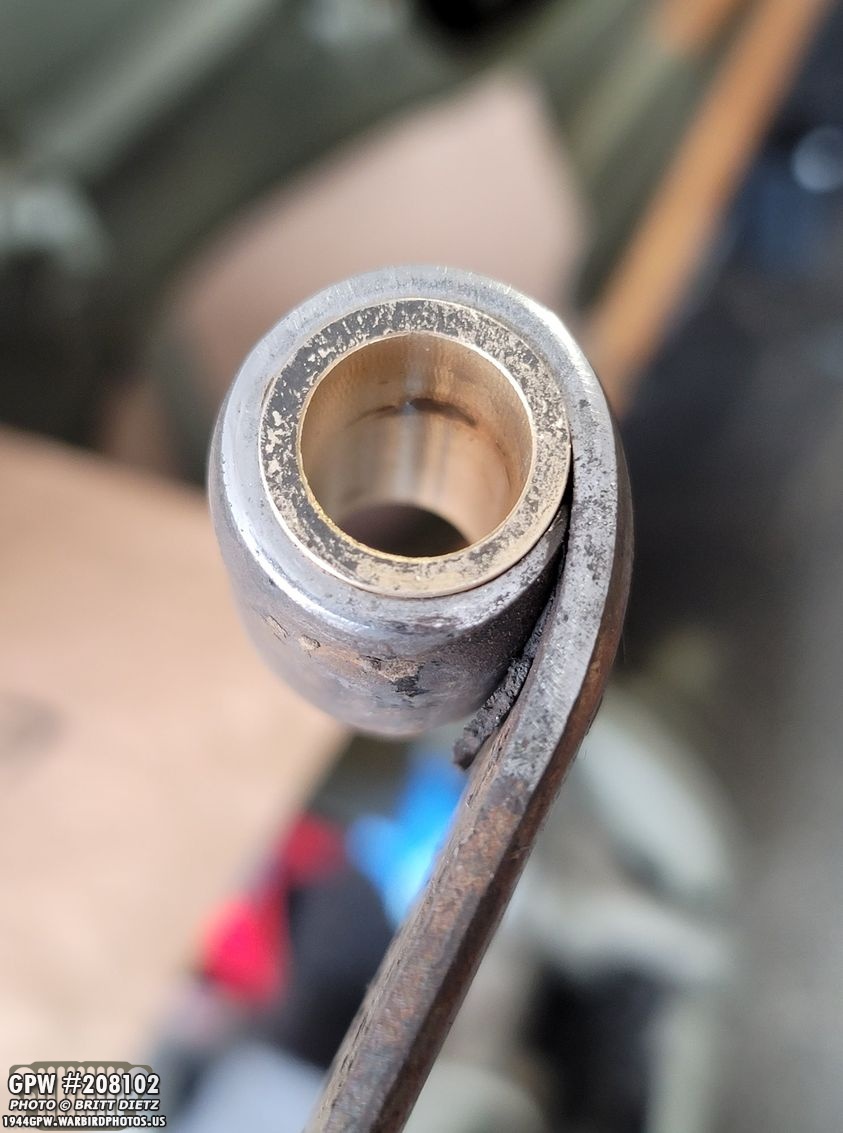
In fact, I closed it a bit too much. Whoops! So I tapered the edge of one of the original bushings so it was thinner, hammered that in half way so it would ‘expand’ the curl a little bit, then hammered it back out. I put one of &Ron Fitzpatrick Jeep Parts new bushings in, and it went in with the usual resistance like the others! Nice and tight. I’d say that was a success! Now, you might be saying, I wouldn’t trust it to not uncurl again. I’ll get to our theory on why it curled in the first place and why I think the spring steel is still good a little later in this update.
Since I had this spring apart, I decided to go ahead and wire wheel the entire thing, each leaf top and bottom. It’s a lot more work, but I figured… why not? The other springs I’ve just wire wheeled what I can get to since they are all together.
It took a long time, but there’s something oddly satisfying using a wire wheel to make something look new.
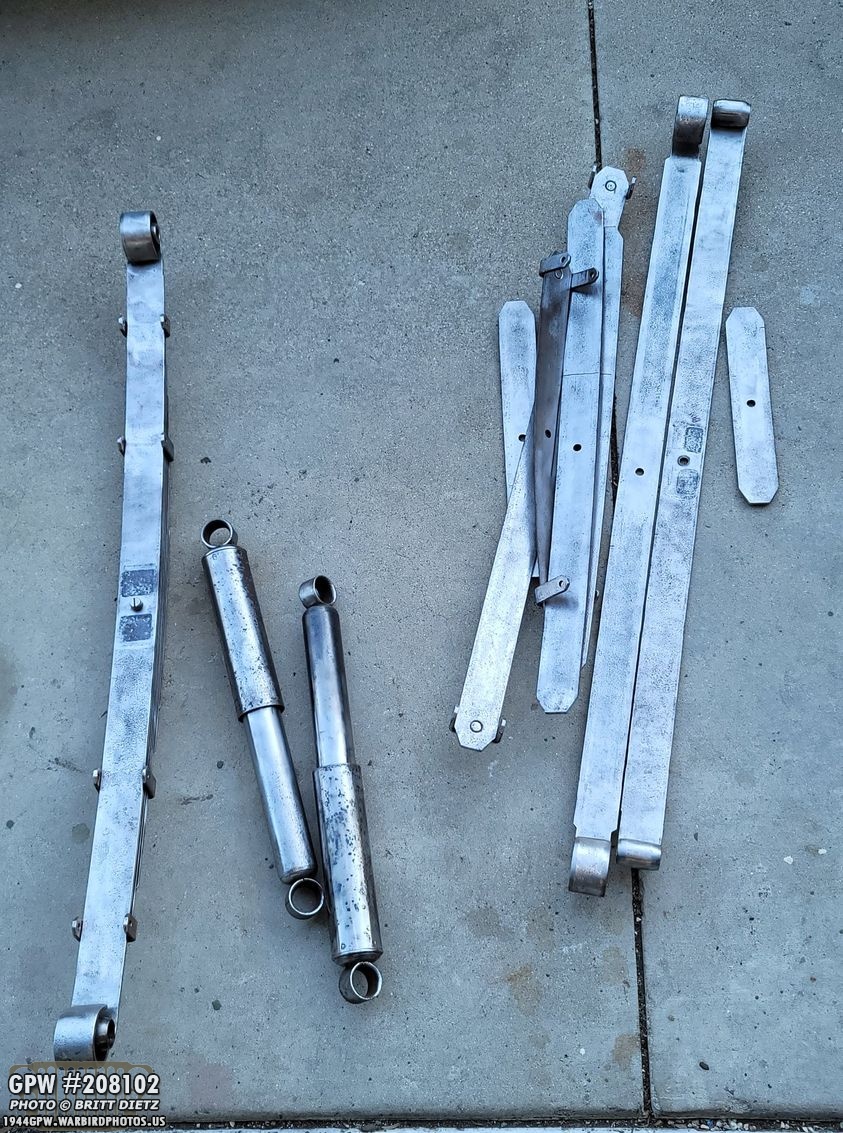
After a full day of wire wheeling, all the leaves were free of rust and paint along with the two original front shocks!
Before putting the spring back together, I wanted to get a photo of all the items that go into a front spring. The GPW clips are riveted on the leaves. I still have the clamp on the head of the center bolt as I didn’t want to have to retighten it. I did rethread the bolt and get a new nut.
It was quite easy putting them back together. I had the little lines I’d drawn to keep track of which leaf when which way. I just lined them up, put the bolt through the center, started the nut just with one or two threads, then used a C clamp to compress the springs back together. Once compressed, I was able to tighten the nut on the center bolt. DONE!
Moving over to the original shocks, I wanted to show how nice they turned out after wire wheeling. There’s still some spots on it that I can’t figure out if it’s rust or some sort of tough as nails coating. Whatever it is, it won’t come off without serious wire wheeling, so it’s good enough.
And here’s a good look at the original Gabriel markings (and the F stamps… the left is almost worn away, but the right one is perfect). All my shocks are original to my Jeep and still usable!
The shackles, shackle cap nuts, universal u bolts, lug nuts, etc then took a trip to the sandblaster.
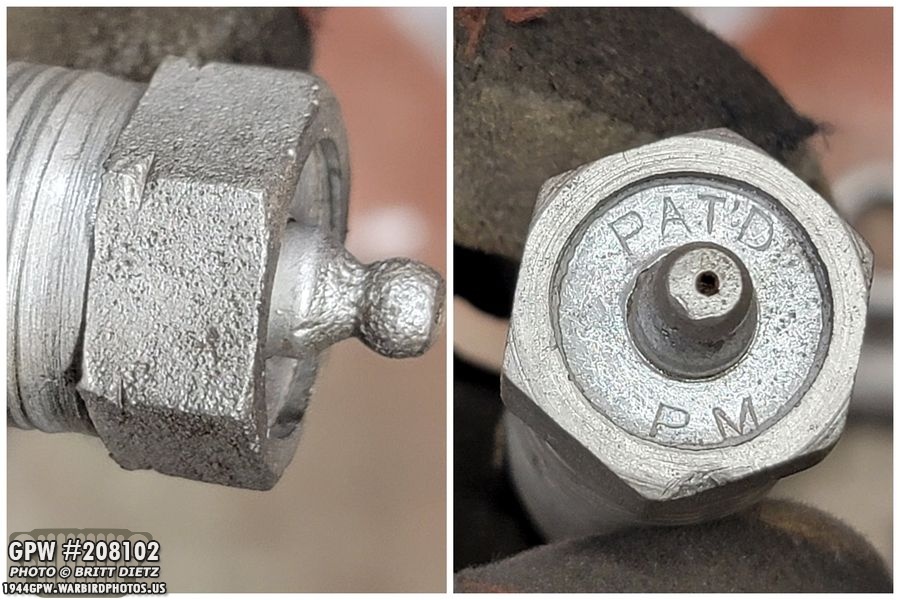
Taking a look at the shackle cap nuts, on the left is the left-hand thread nut, which appears to be indicated by the notches in the head. This cap nut is on the driver’s side bottom of the shackle. All four of the cap nuts have ‘PAT’D P.M.’ on the top.
I noticed that all the universal U bolts for the propeller shafts have a C stamped on the inside. Again, not sure if that means they are original or not, couldn’t find any info on that.
The left-hand thread lug nuts are originals, but there weren’t enough right-hand thread nuts with the R to use, so I went and got a new set.
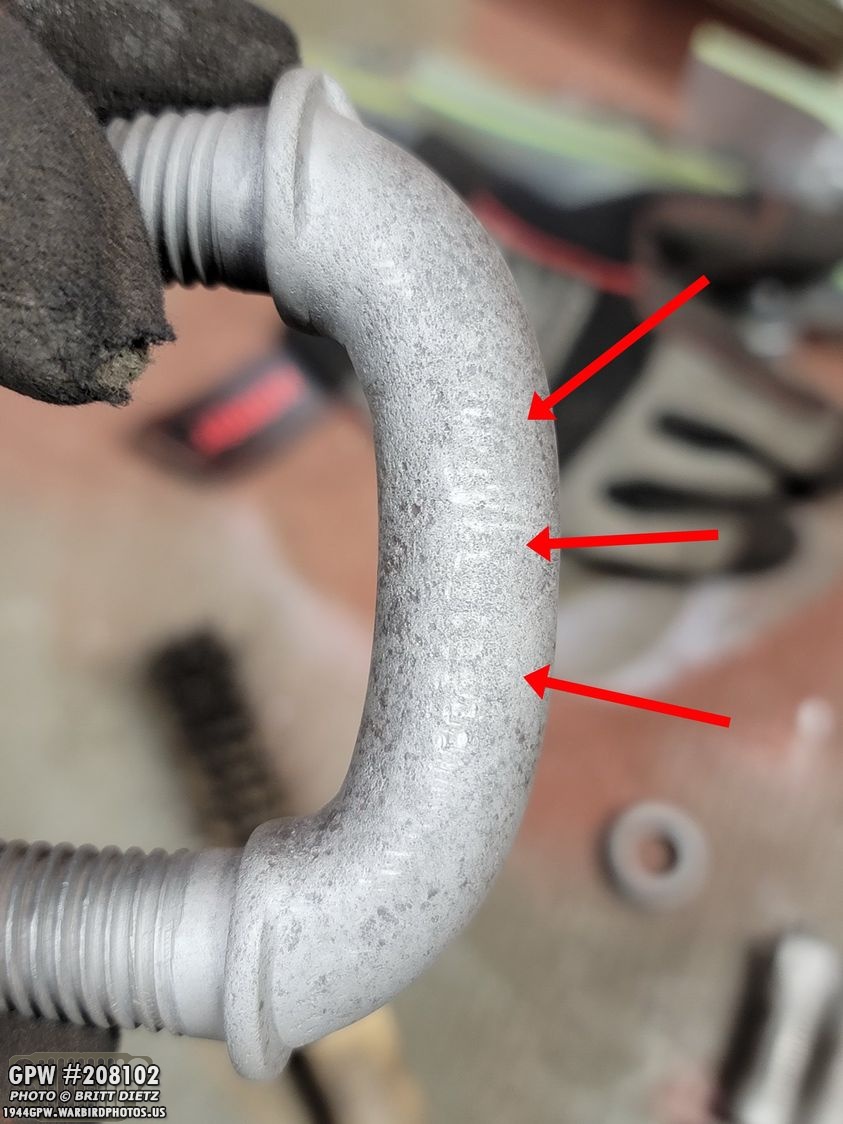
And going back to what I was talking about, here’s the reason we think that #1 leaf on the passenger side front spring had the partially unraveled curl making the bushing fall out is that at some point, someone used the shackle on that side to pull something. You can see there are horizontal scarring on the shackle, appearing like as if something was tied/chained to it at some point. This would account for extreme force on the rear bushing, causing the curl to unravel slightly. It might have been something super heavy. This Jeep was used on a farm for many many years after WW2. But that’s the theory based on this shackle.
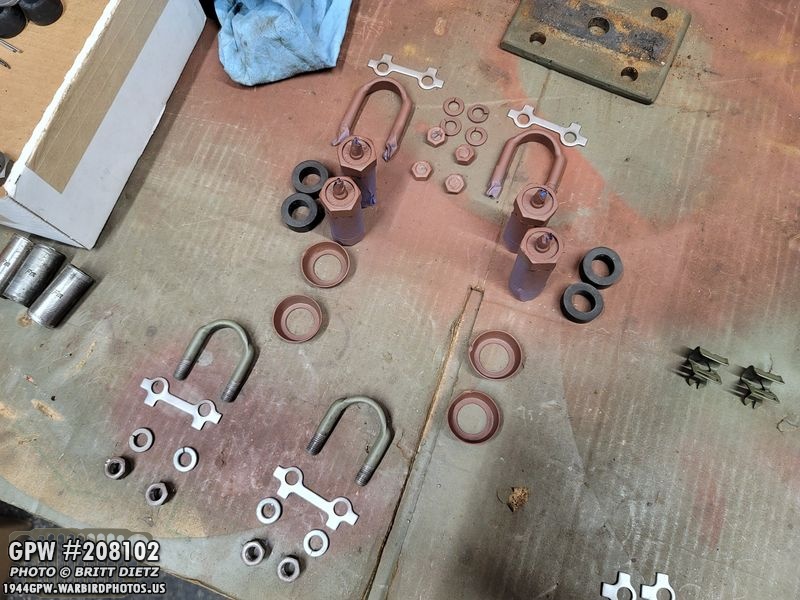
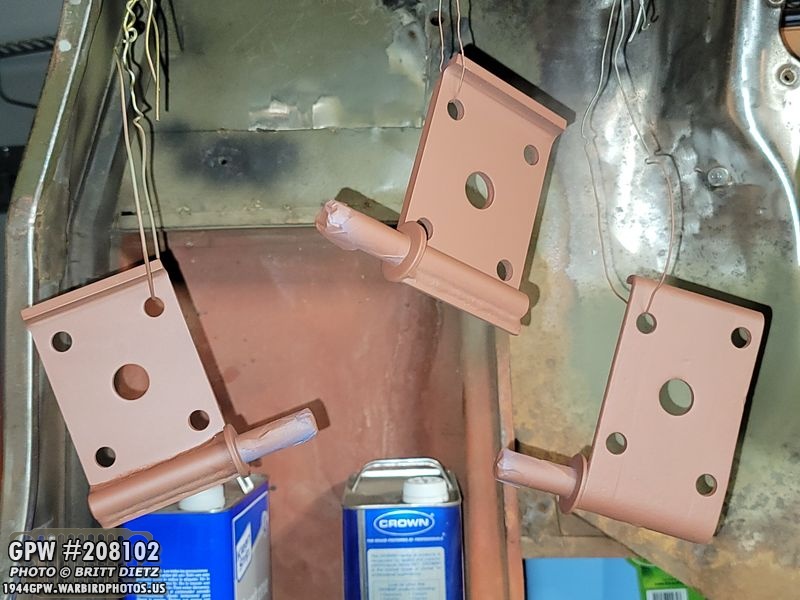
With the various items cleaned and sandblasted, it was time for painting! Here’s &Ron Fitzpatrick Jeep Parts Red Oxide Barrier III primer on several items. I’ve used painters tape to mask off any threads.
The shackles getting some primer.
Universal U bolts and shackle shields getting primer.
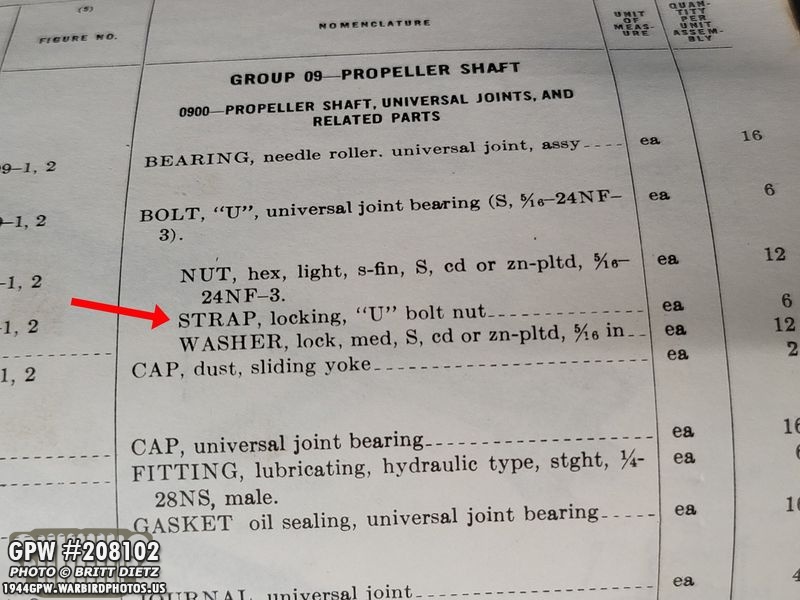
Speaking of the Universal U bolts for the propeller shaft, I was looking up the nut side to replace the worn nuts that were on mine, and I noticed in the ORD9 it calls for lock straps on the bolts. Mine did not have that at all, just the lock washer and nuts. So I went online…
And I found &Ron Fitzpatrick Jeep Parts sells them! so I bought a set, along with another spring pivot pin for the front passenger spring. Ron actually sells F stamped lock straps, but he’s out of them and I didn’t want to wait for them. The Fs would be incredibly hard to see anyway once installed.
Here’s how a Universal U bolt should go on the propeller shaft yoke… the U bolt, the lock strap, a lock washer, and a nut.
Once the nut is tightened, you then knock over one of the tabs so that it is bent downwards against the side of the nut that has the flat end (only one side will line up on the lock strap. This prevents the nuts from spinning. It’s the same thing with the lock straps on the ring bolts on the carrier.
More items getting primer and paint. Also taking stock of things!
I realized I hadn’t yet taken the front propeller shaft off the Jeep yet. Mostly because it means you have to take off the skid plate, which is quite the work to do. So, I had a free night and decided to get to it.
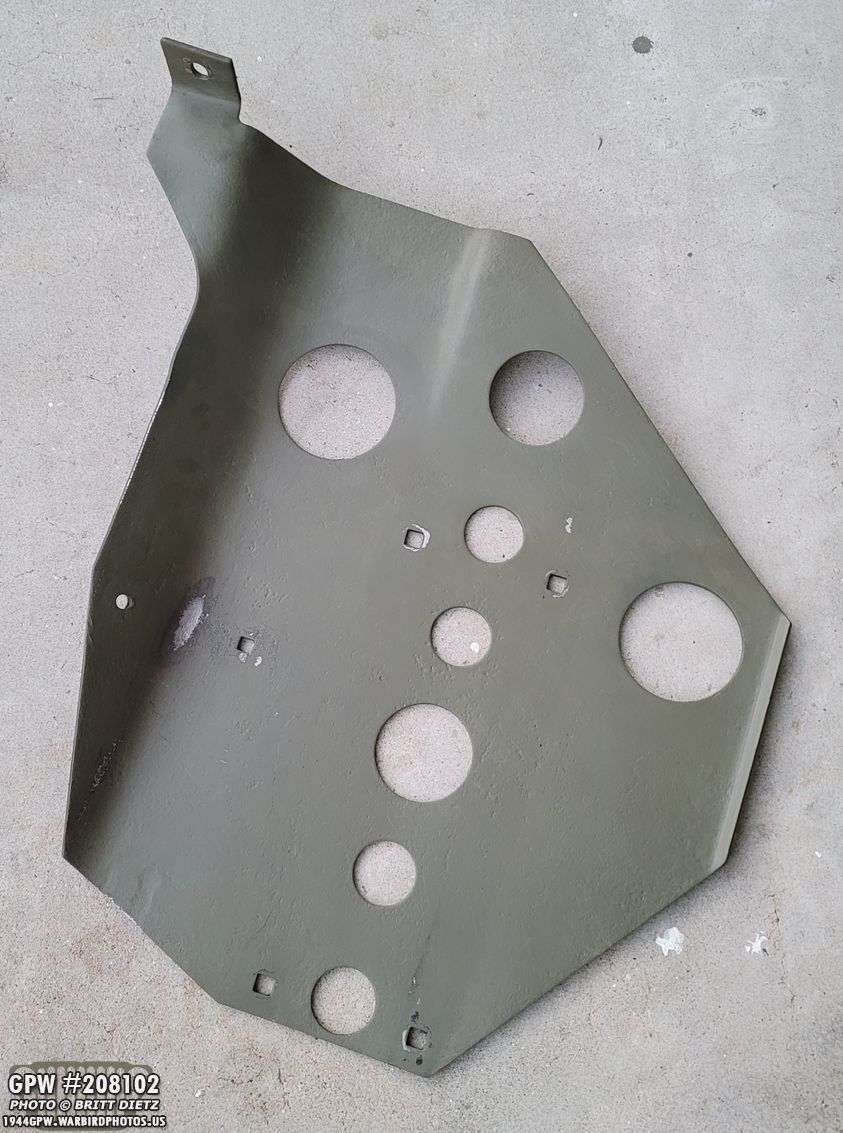
It’s a pain to get this off, there’s hardly any clearance to get the carriage bolts off. You literally have to use a flat wrench and slowly spin the nuts off 1/4 turn at a time. Takes a long time. I completely wire wheeled, cleaned, and repainted the skid plate (it’s original with a partial F stamp) back when I did the main restoration in 2019. You can see how gunked up it’s gotten in the year and a half’s worth of time.
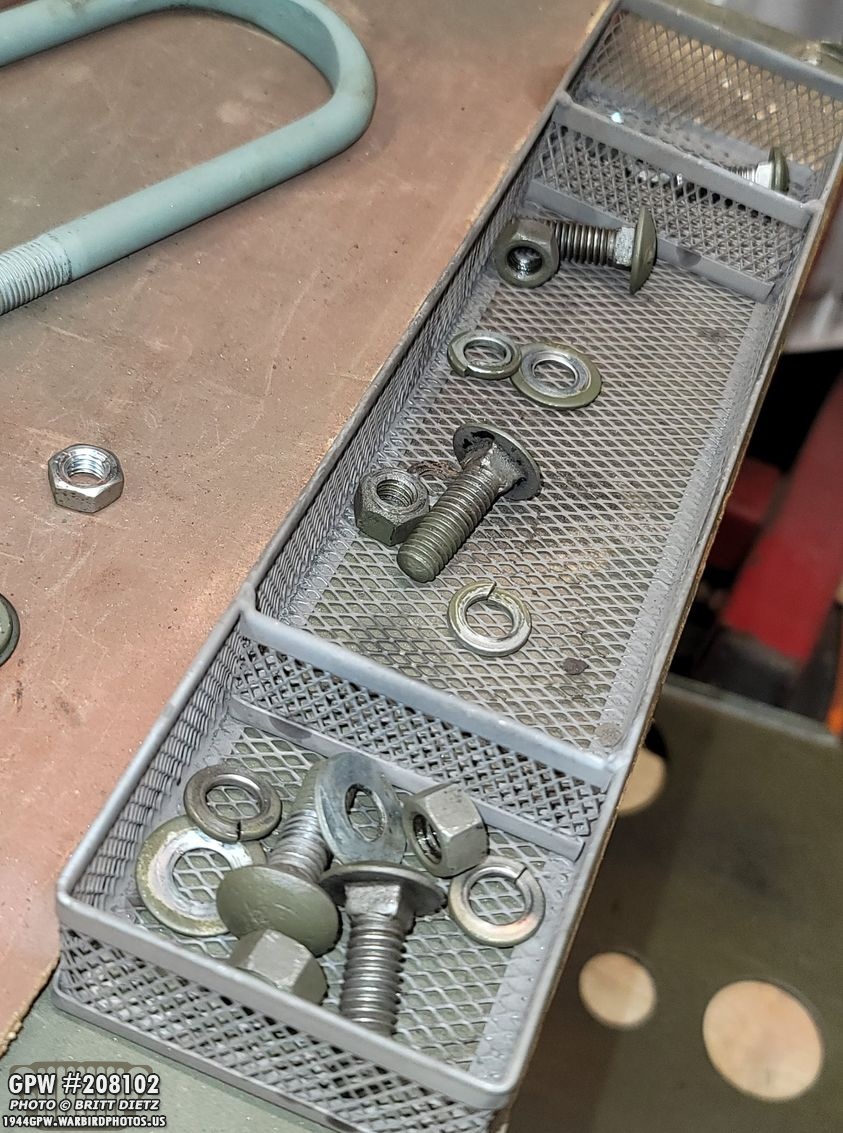
Here’s a look at the carriage bolts. I’ll clean them up and touch up the paint on them before they go back on.
One of the biggest headaches getting the skid plate off is the exhaust tube clip. This clip holds the exhaust tube to the skid plate, and it’s a super paint to get off. Especially since the inner side (yellow arrow) is where a smaller carriage bolt holds down that side of the bracket with a nut. Well, the way it lines up, the nut hits the side of the bracket making it super hard to turn.
With the skid plate off, I can get to work removing the propeller shaft.
What I found really helped was putting the Jeep in 1st gear, and then engaging 4-wheel drive. That would lock the propeller shaft so I could break free one nut. Then, once I get that nut off, I would disengage the 4-wheel drive, turn the propeller shaft so I could access the next nut, then reengage the 4-wheel drive. Wasn’t long till I had all the nuts off and the universal U bolts off.
Here are the shaft and U bolts after it was off. I will wire wheel/clean this to the metal and repaint it.
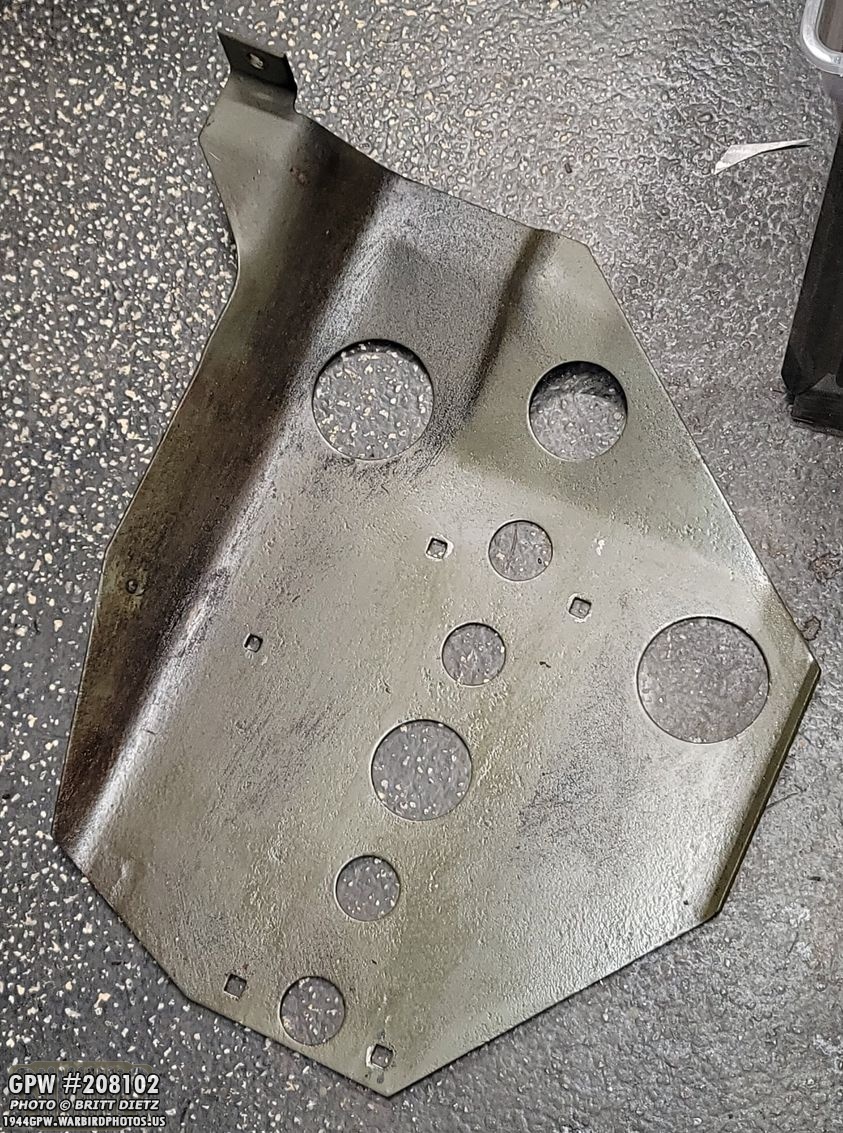
Going back to the skid plate, I used some degreaser to clean off the oil and grease that’s built up. Looks a lot better! But needs some paint again.
Had some left over 33070 OD Green paint while painting other items, so I used what I had left to give it a fresh paint job. So much better!
I took that exhaust tube clip and decided to take my angle grinder with a flap wheel and grind down that area where the nut collides with the bracket. This should do the trick and prevent that issue! I’ll prime and paint this so it’s ready for reinstall later.
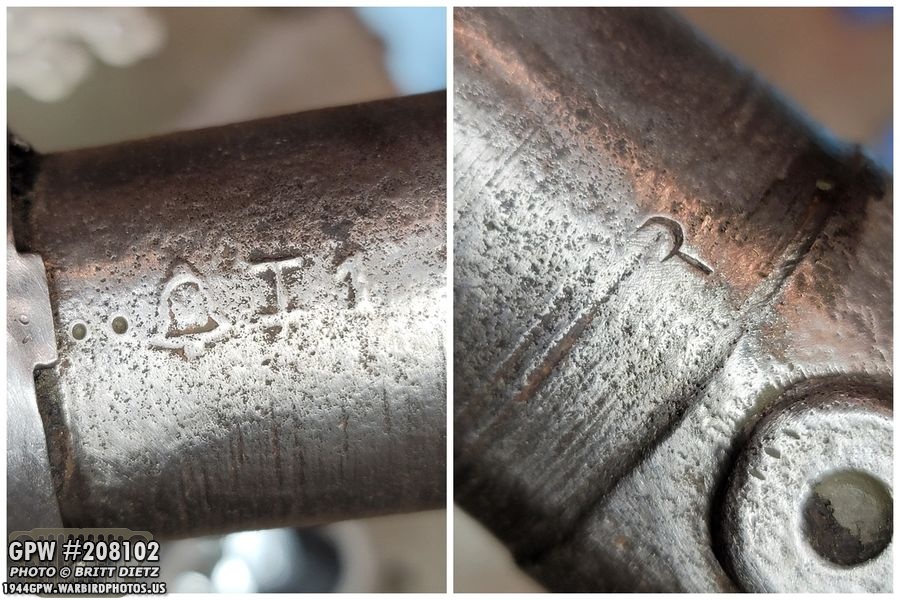
Moving to the propeller shaft, I started looking for markings to see if it’s a GPW propeller shaft or not. Keep in mind I never touched these when doing the original restoration in 2019. After some quick wire wheeling, I found the exact same markings as the rear propeller shaft… a bell with an M in it followed by an I and 1. Then on the other side, there’s a partially stamped R.
It was then I noticed something, what looks to be a faint GP 7091 F4! That lines up with GPW propeller shafts I’ve seen online, which is great! I never noticed these markings on the rear propeller shaft (which is all painted and ready for install, but not installed yet), so I went to look…
Sure enough, it was there! But REALLY worn away, so much so I must have not even realized it was there when restoring it. Again, it appears to be GP, possibly another 7091, a circle which is supposed to have a small F in it, and F3.
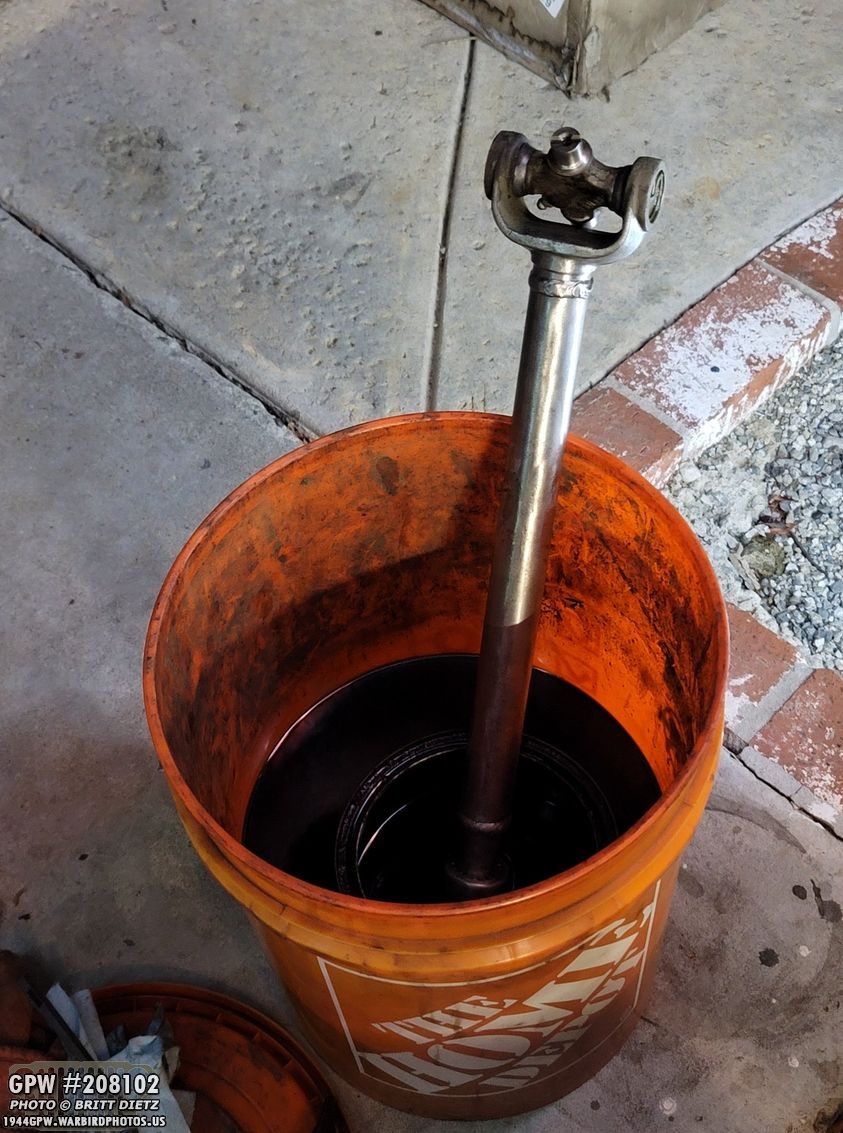
Going back to the front shaft, the universal joints were really caked with grime, so I dunked both in gasoline (after taking off the caps with the needles!) for a few hours.
The next day, I wire wheeled the shaft, which made the markings come out a little better.
These markings are the most confusing, especially since they are the same as the rear shaft. Note, I know I don’t have two rear shafts as they are both physically different in length.
There was also this marking of two dots, and a partial letter.
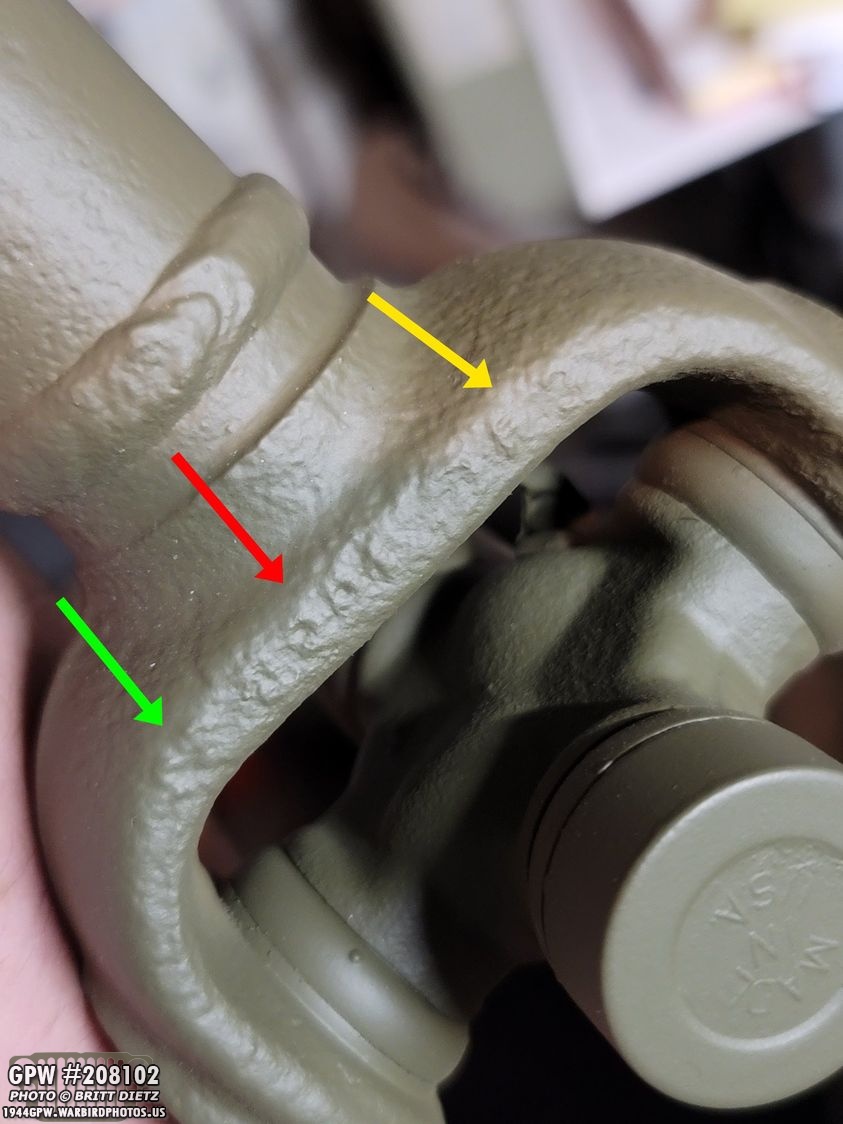
The universal joint had some nice markings, including a SPICER company name! Cool!
On the back of the Spicer universal joint was this.
I mentioned a few weeks ago about how when I was taking out my old main brake line, there were two clips holding the line to the inside of the frame with hex bolts (one of which was a EC Willy’s MB bolt). I did some research and discovered that GPWs actually used what’s known as Carr clips to hold the brake lines. These little clips are spring-loaded and just snap into the holes on the frame. I found someone selling NOS Carr clips on eBay, so I bought two!
I painted them 33070 OD Green soon after. I’ll install these when I go to install the new main brake line. Another fine GPW detail acquired!
With the front springs all cleaned and ready to go, it was time to prime them! I reinstalled the clip bolts with the custom F stamps, and hung the springs (and shocks) outside.
I wanted to document the bolts before they were painted. Really proud of how these ones turned out.
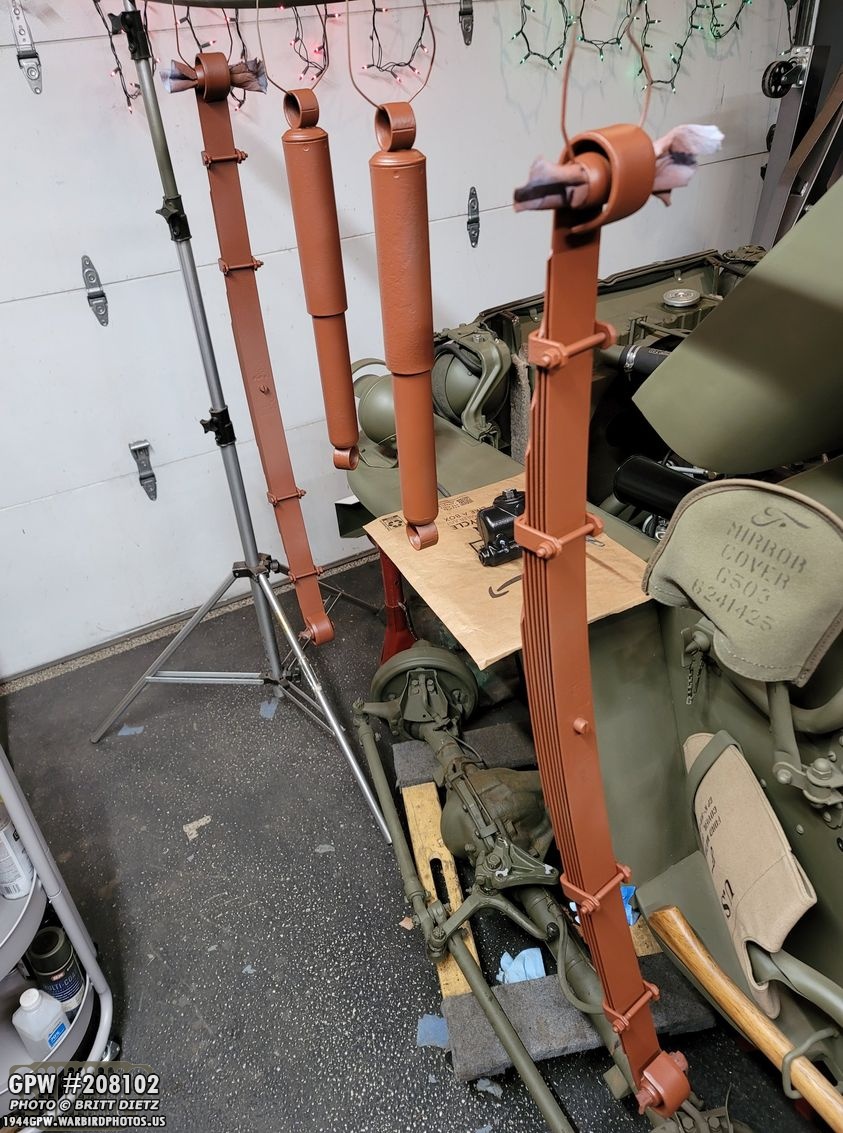
And here they are! First coat painted on the front springs and shocks! Due to limited time with the holidays, this was a multi-day process to get them coated with two coats of primer.
And here’s how the F stamps look after primer. Looks legit to me!
And another one. The paint really seals the deal on these custom F stamps.
Here they are with the final coat of primer drying in the ‘somewhat hot’ sun.
Here I’ve lightly used a scotch pad to ‘scuff up’ all of them in prep for the first coat of 33070 OD Green! Look for that in next week’s update!
In prep for reinstalling things, I touched up the paint on the original GPW drag link. It’s already been painted since early 2020, but sitting off to the side in the garage for almost a year means it had the occasional scratch from things being sat next to it.
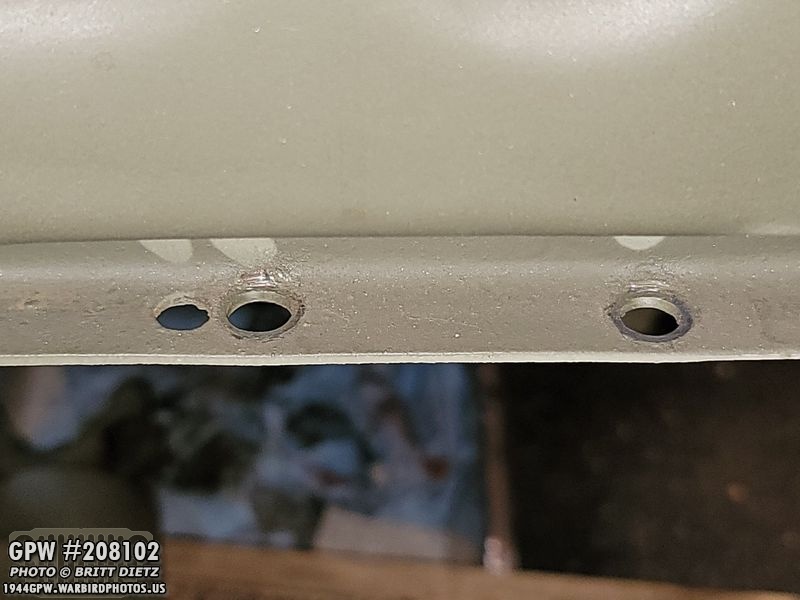
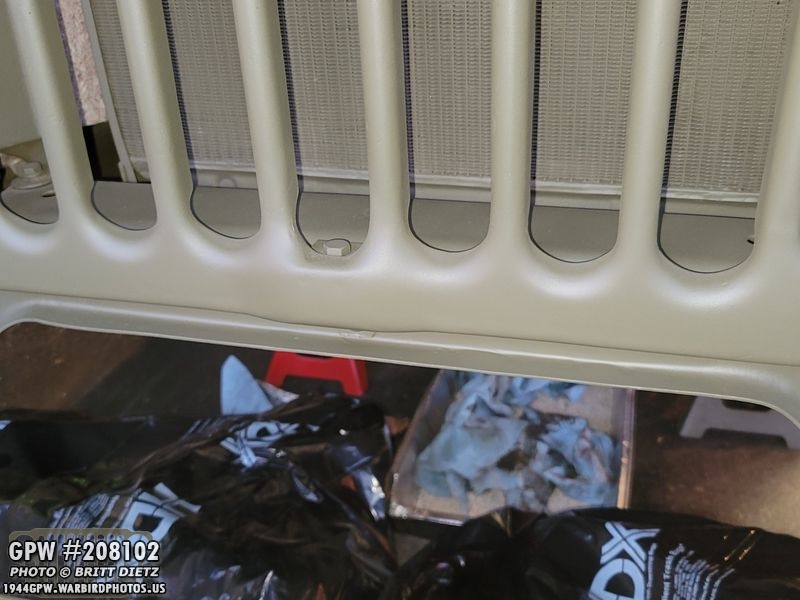
I still had to content with the holes that were left in my front cross-member where the CJ axle steering system was bolted on. For those who haven’t been following, my Jeep has had CJ axles and a CJ steering system on it since I got it. After WW2, the steering bell crank was attached to the cross member to counter the effect of the left-hand turn pull the Jeeps would do when brakes are applied. Someone drilled these holes many many years ago and installed the CJ system on my Jeep. So, with that all removed, I needed to fill the holes.
I could have welded them shut, but that would require me to take off the grill, and that would be a whole process. I decided just to use JB Weld Steel and fill them up. After hardening for 48 hours, I sanded the JB Weld smooth and primed/painted it. You can’t even tell there were holes there now!!
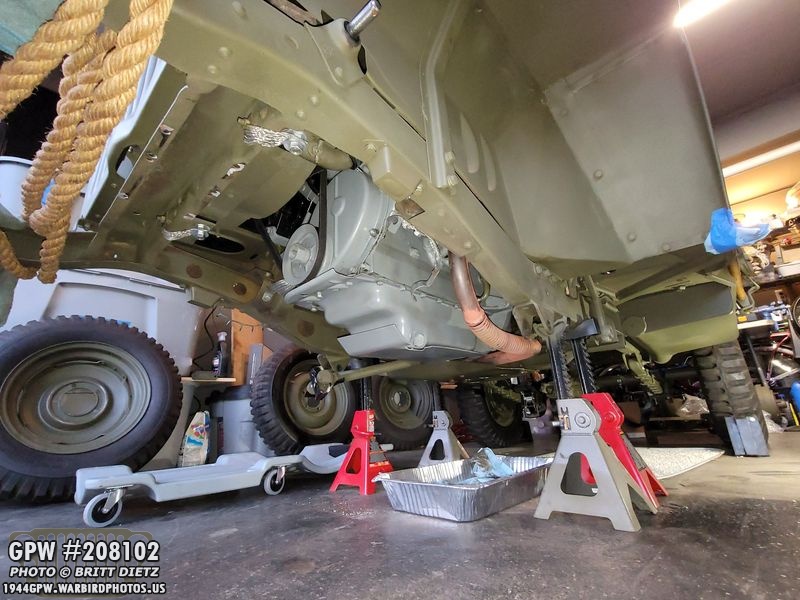
In prep for the coming work, I went ahead and moved the GPW front axle underneath the Jeep. Won’t be long now till that’s installed!! (it’s been in trash bags being protected from dust and debris the last few weeks). Also in this photo, you can see I’m doing some slight cosmetic work to the rivets on my top frame gussets. They had some imperfections, so I’m using a little spot putty to fix it.
A friend of mine bought the four military NDT tires that were on my Jeep on the CJ rims from me, and had them taken off returning the rims to me soon after. Now that the rims are back, I have FIVE of these solid CJ rims (16 size) that I’ll be selling. If you’re interested, let me know!
Something I got for Christmas for the Jeep is this awesome original NOS Cotter Pin kit! From what I’ve been told, this is an entire cotter pin set for a Jeep and was often kept as spares in the Jeep. Pretty awesome! I’ll keep them in my spare tools bag.
I haven’t touched on the resolution with the rear axle leaf plates that were bending when I was torquing them (see update from last week). I have replacement ones from another vendor that, once I finish with the front axle, I’ll be revisiting and taking off the bent ones and putting these on instead. So I’ll cover all that in a later update.
Also, next week I’ll showcase how I took the fender bolts and made them into custom made F stamped bolts!
And another preview for next week, installing the Torque Reaction Spring! Lots of fun stuff these next few weeks! Thanks for reading this week’s update, I appreciate all the support, comments, and likes from all of you throughout the year! Till next week…

